Server location plays a vital role when the time comes to increase website speed optimization and decrease the load time. Think that if most of the visitors come from the United States, and your server location is Singapore, in this time, your site will take longer time to load than usual.
Having a server location that is close to your target audience can greatly improve website loading speed and overall user experience. Hostinger allows their user to change their server location once in every 30 days, giving flexibility and the chance to test different locations for optimal performance.
If you just start and don’t know How to Change the Server Location in Hostinger, then this tutorial is for you.
In this tutorial, I’ll talk about how you can change your server location by using Hosting hPanel within a few clicks. So, let’s get started.
Quick Access
ToggleWhere Are Hostinger Servers Located
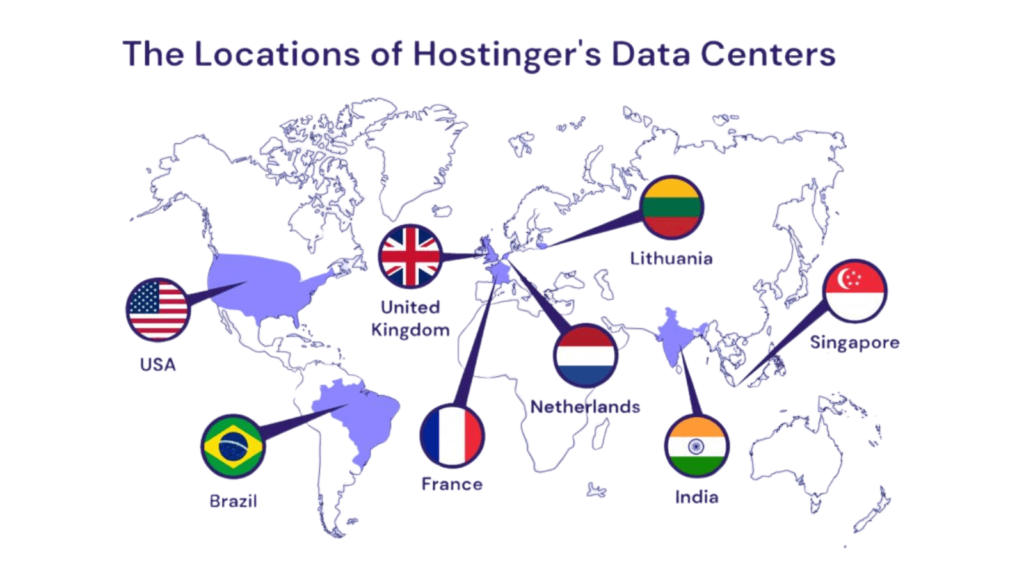
Here’s the list of the Hostinger server locations:
- North America (USA, AZ)
- Europe (France)
- Europe (United Kingdom)
- Europe (Lithuania)
- South America (Brazil)
- Asia (India)
- Asia (Indonesia)
Video Tutorial
How to Change Server Location in Hostinger
Now let’s jump to our main topic, how to change server location in Hostinger within a few clicks.
First, you need to log in to your Hostinger hPanel (Means: Hostinger cPanel).
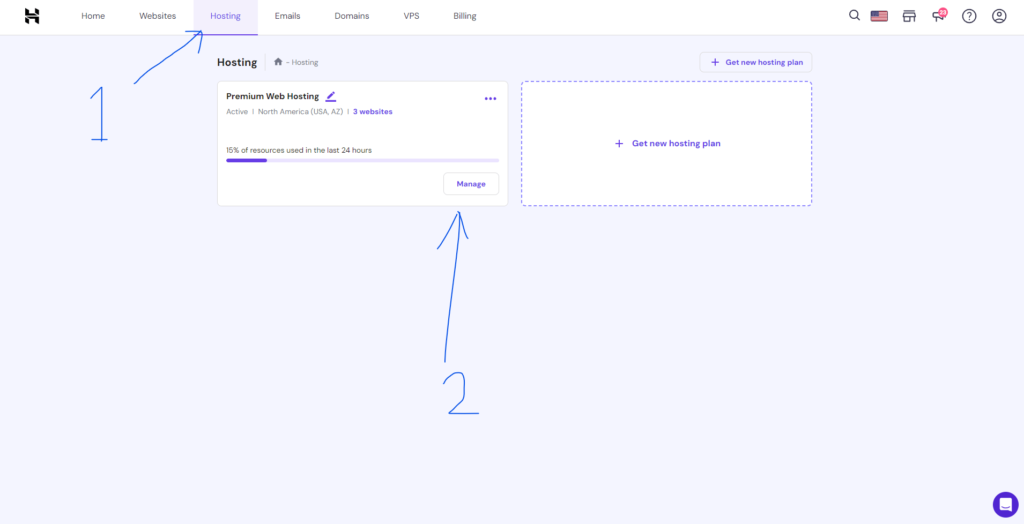
After login to your Hostinger hPanel, you need to click on Hostinger from the header, then the Hosting page will open. When this page is opened, then you need to click on the Manage button.
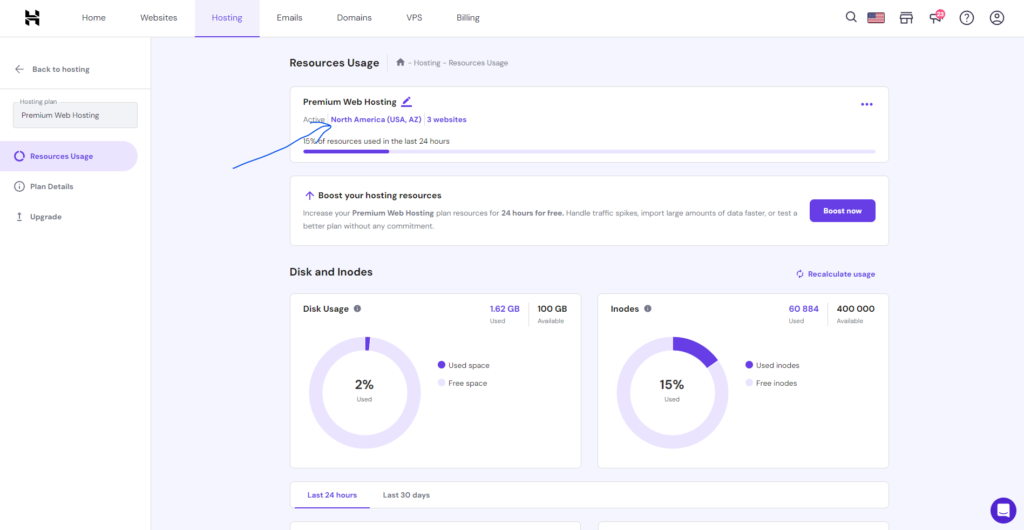
Then you need to click on your data center name text (North America (USA, AZ), as in the screenshot.
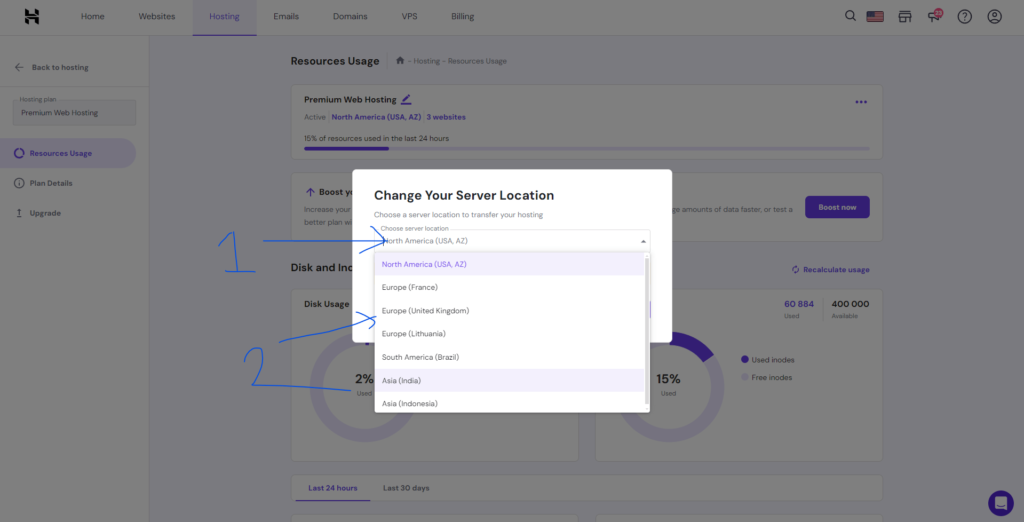
After clicking on the data center name, a pop-up window will appear with the list of available data centers. From this list, you need to select your data center location based on your target audience or the location you want to test.
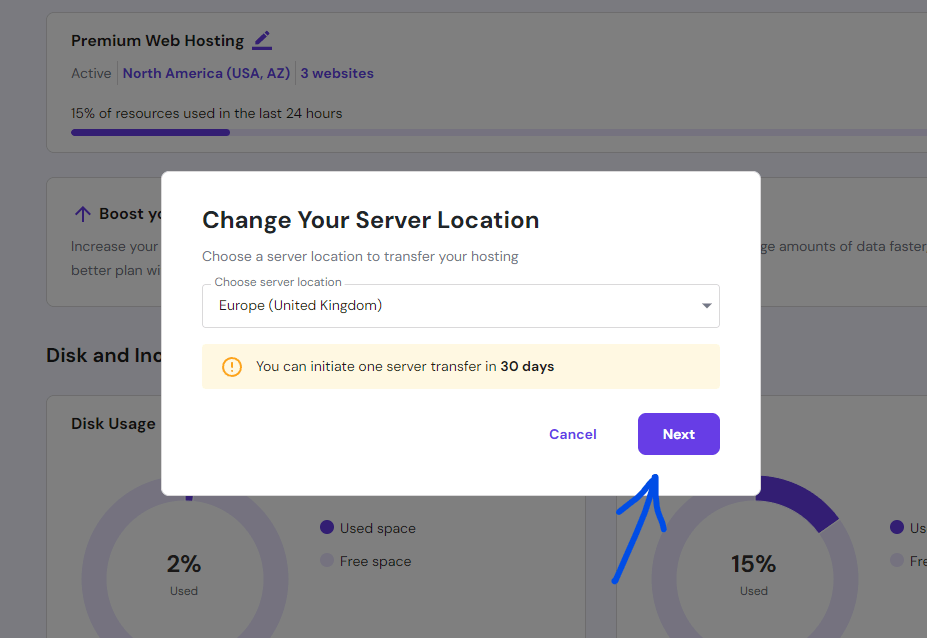
After choosing the best data center, click on the next button.
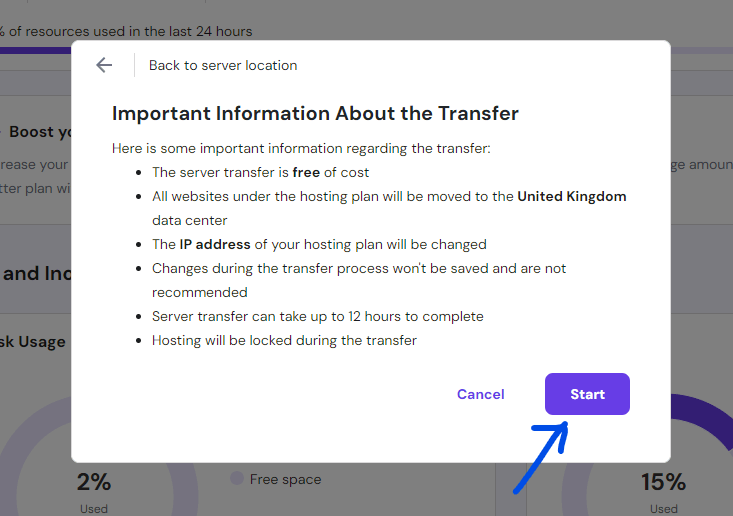
And lastly, click on the Start button. After pressing the Start button, you will see the changing process started.
Tips While Changing Data Center Location
Before changing the data center location, make sure to take a backup of your website.
- While changing your server location, you don’t need to worry about any downtime as the process is seamless and doesn’t affect your website’s availability.
- Don’t change anything within 12 hours after changing your server location. This ensures that the changes are fully propagated and your website is stable.
- You can check your website on Pingdom.com or GTMetrix.com before and after changing the server location to see the improvement in loading speed.
- After the server change your IP address will also change, so make sure to check your email settings if you have any email accounts associated with your website.
Conclusion
Hope this article, solves your problem of changing your server location in Hostinger.
By changing your hosting server location, you can optimize your website speed and improve user experience for your target audience.
Everyone likes fast-loading websites, and Google gives a higher rank for fast-loading websites, so it’s essential to choose the right server location.
Remember one thing, Hostinger allows you to change your server location every 30 days. So, think again before changing your server location, if you are not sure about the new location’s performance.

