WordPress is the most popular and used website builder worldwide; almost 43.2% of live websites are made with this popular platform.
The reason behind the popularity of WordPress is its user-friendly interface, SEO-friendly, free-to-use, and the availability of free resources.
On the other hand, Hostinger is the most popular web hosting company world, which is well-known for providing affordable web hosting services.
Hostinger is the perfect place to start and host your WordPress website if you’re a beginner or intermediate. Today’s tutorial will cover How to Install WordPress on Hostinger in less than minute.
Quick Access
ToggleWhy You Need to Install WordPress on Hostinger?
When someone starts their website journey, most website owners seek the best web hosting services at the most affordable price possible.
But the package price will skyrocket if someone needs good web hosting to handle a few thousand traffic. Then the question arrives on their mind, is it possible to get good web hosting at an affordable price?
On this place, Hostinger has an affordable web hosting plan, but the performance of their hosting package differs. And their average response time is 116ms for the past 12 months.
Hostinger offers a free domain name with unlimited SSL certificates, hosting up to 300 websites, unlimited bandwidth, free CDN (Content delivery network), business email address, and more.
They also offer a custom-built control panel called hPanel. hPanel is super easy to use for a beginner, and it provides a one-click WordPress installation process. So, it’s a win-win situation for those who want to install WordPress on Hostinger.
How to Purchase Web Hosting From Hostinger
This section will guide you to purchase web hosting from Hostinger. If you already bought or you want to use your existing hostinger account, then you can skip this step:
Step 1: Go to Hostinger
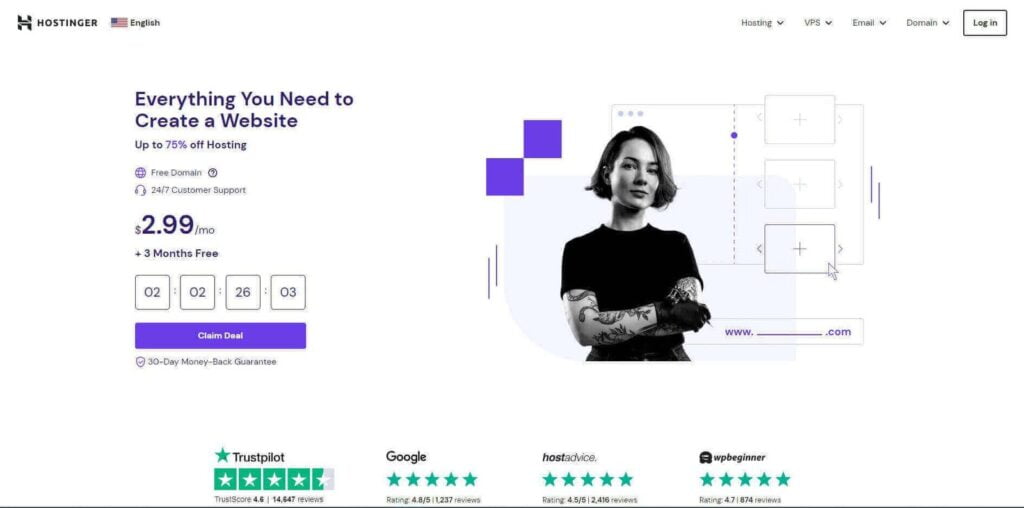
To purchase hosting from Hostinger, you must go to the Hostinger website. You can go to the Hostinger website by typing “hostinger.com” on your web browser, or you can also go to the website by searching for Hostinger on any search engine.
Step 2: Choose Your Hosting Plan
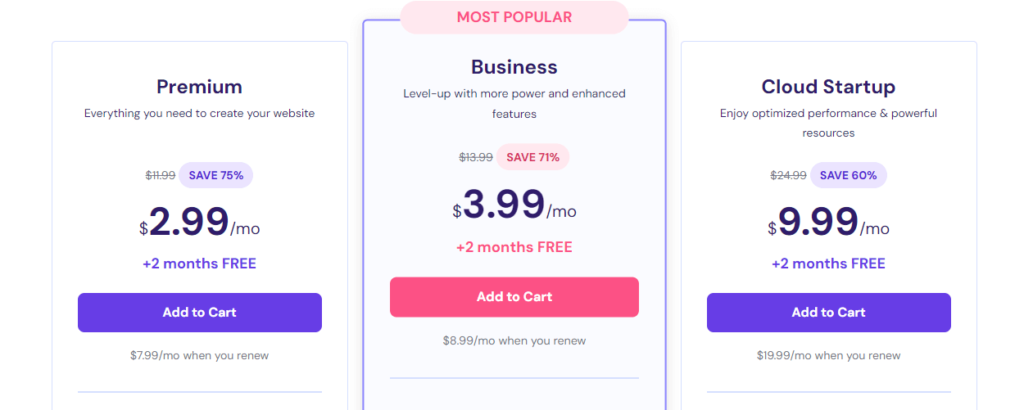
If you come to this step, you have already visited the hosting website. In this step, you need to choose a web hosting plan from hostinger.
Hostinger offers various website hosting services like Web Hosting, WordPress Hosting, Cloud Hosting, VPS Hosting, and more. You can choose any one of them according to your needs and budget.
But we want to use Hostinger to install WordPress, so we must go with their WordPress Hosting plan. Hostinger offers three types of WordPress Hosting plans, they are:
Premium: This hosting package is best for beginners and new website owners who want to host a single website.
Business: If you have multiple small websites that receive medium traffic, this plan suits you.
Cloud Startup: This plan suits resource-heavy websites with high traffic.
Step 3: Choose Billing Period
In this step, you must select your billing period to purchase web hosting services from Hostinger. Hostinger allows you to go with 1 Month, 12 Months, 24 Months, and 48 Months plans.
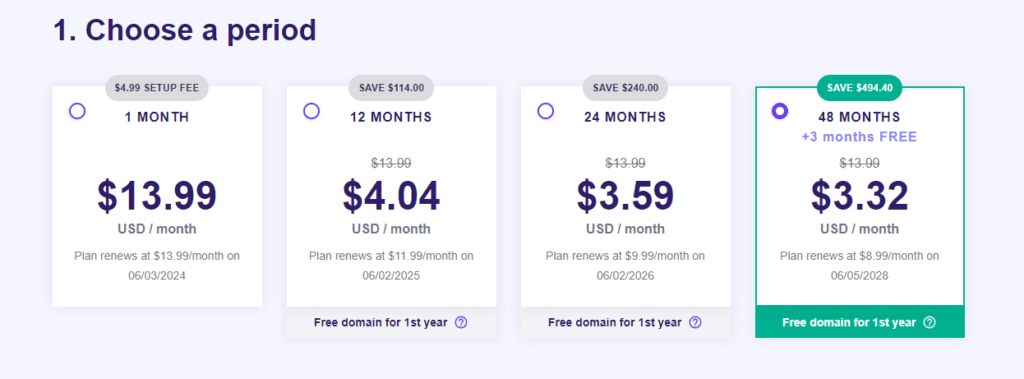
Their 1 Month plan costs you $13.99/Month, but if you go with the 48-month plan, it costs you $3.32/Month. The longer the billing period you choose, the more money you save.
Step 4: Create an Account

In this step, you must create a new account or log in with your existing Hostinger account. If you’re a new user, enter your email address and create a password. You can also go with a Google or Facebook account.
After logging into your account, let’s jump to the next step.
Step 5: Review Your Order and Make Payment
In this step, you need to review your order and make the payment to complete purchasing web hosting from Hostinger.
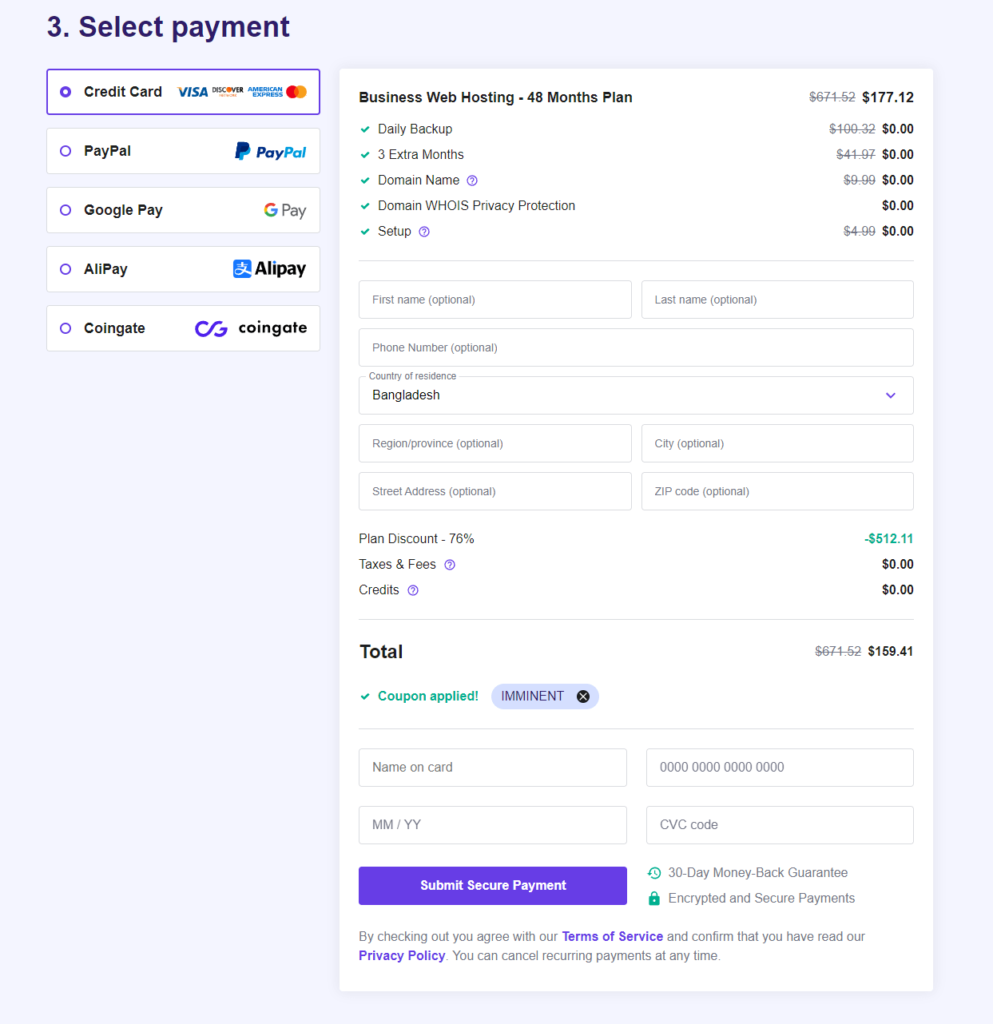
Hosting offers various payment methods like credit cards, debit Cards, Google Pay, Apple Pay, Bitcoin, etc. Choose any one of them and make the payment. After successful payment, you can proceed to the next step.

Wait! Wait! We also offer all kinds of web hosting coupon codes on our website. To get a Hostinger Coupon, visit our Hostinger Coupon Code page for an additional discount on Hostinger checkout.
Step 6: Claim Your Free Domain From Hostinger

After purchasing hosting from hostinger, Hostinger offers a free domain name with your hosting package.
Under the account section, you’ll find an option to Claim your domain name. So, you need to click on the Claim Domain button.
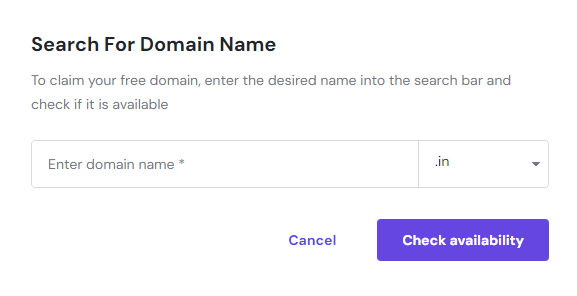
Then, you need to search for your domain name; if it is available, get it for free. If your desired domain name isn’t available, you can choose a different TLD or search for other domain names.
How to Install WordPress on Hostinger
In this step, we’ll discuss how to install WordPress on Hostinger. First, you need to log in to your WordPress website.
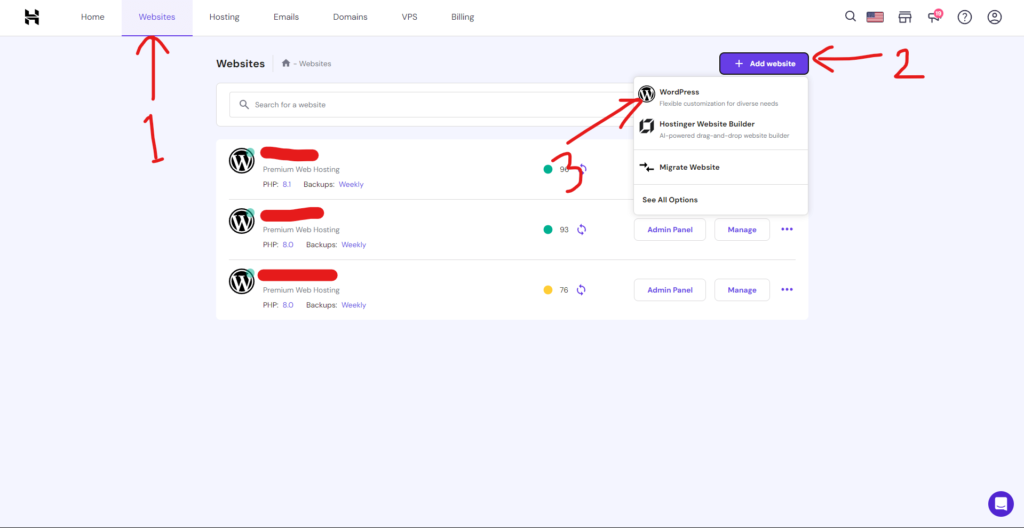
After coming to your WordPress website, firstly, you need to click on the Website button from the header, then you need to click on the “+ Add Website” button and select WordPress.
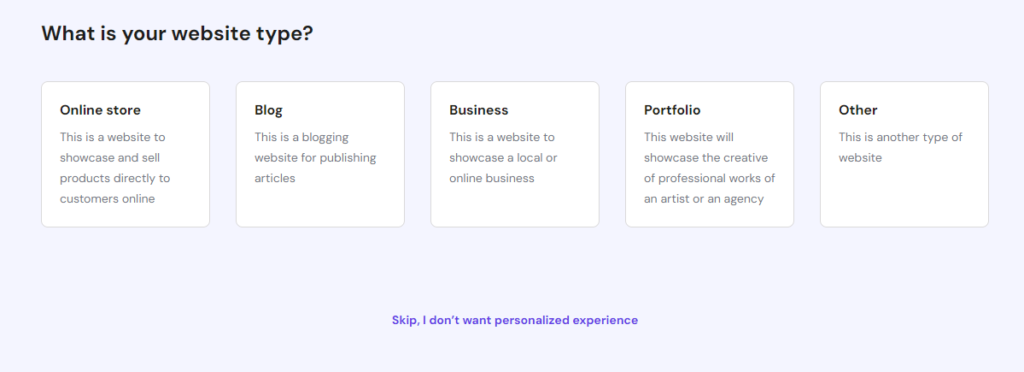
Then, you must choose the website type you want to create. But you can also skip this step to avoid a personalized experience.
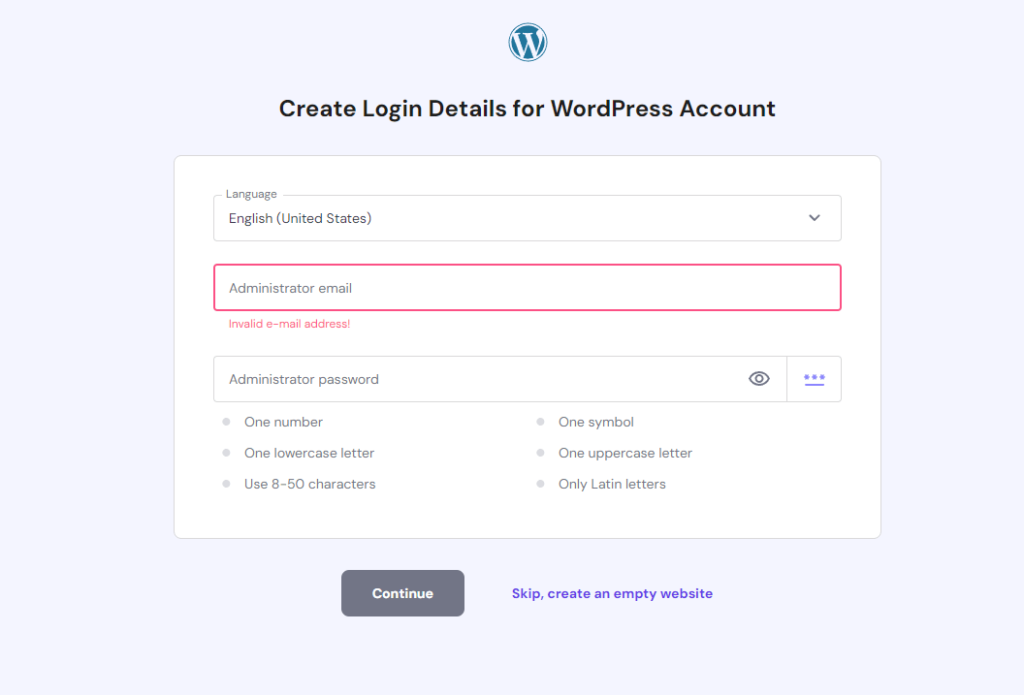
In this step, you must provide your website login Email and Password and click on the Continue button.
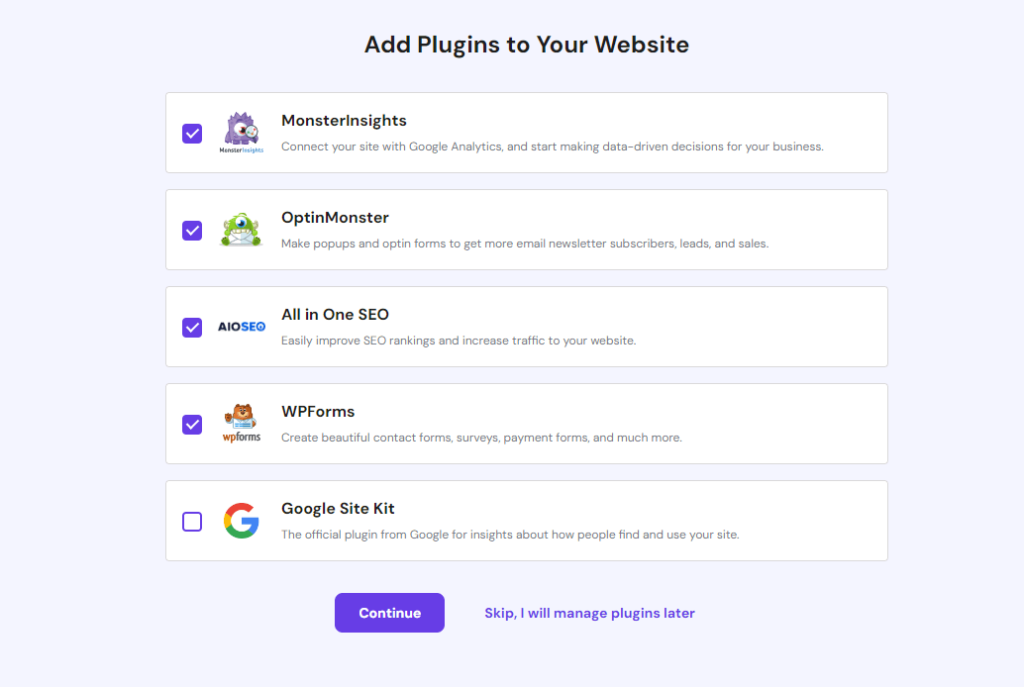
In this step, Hostinger offers to install a few pre-install plugins, but if you don’t want those plugins, you can skip installing this plugin by clicking on the “Skip, I will manage plugin” later button.
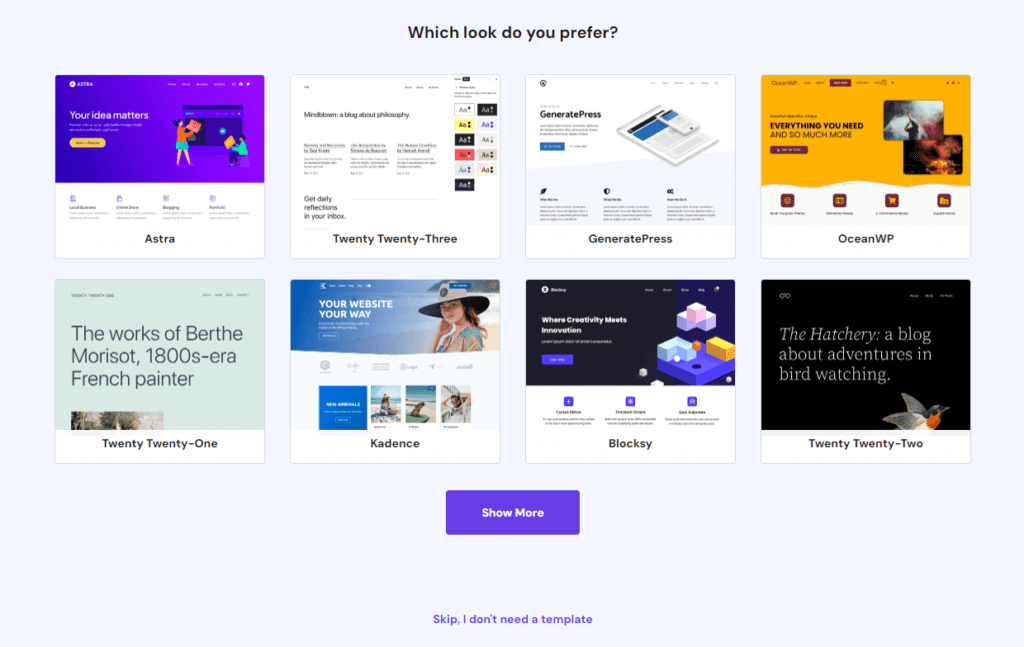
Then, you need to choose a theme for your website. But if you want to install WordPress on Hostinger without pre-installed themes, you can click the “Skip, I don’t need template” button.
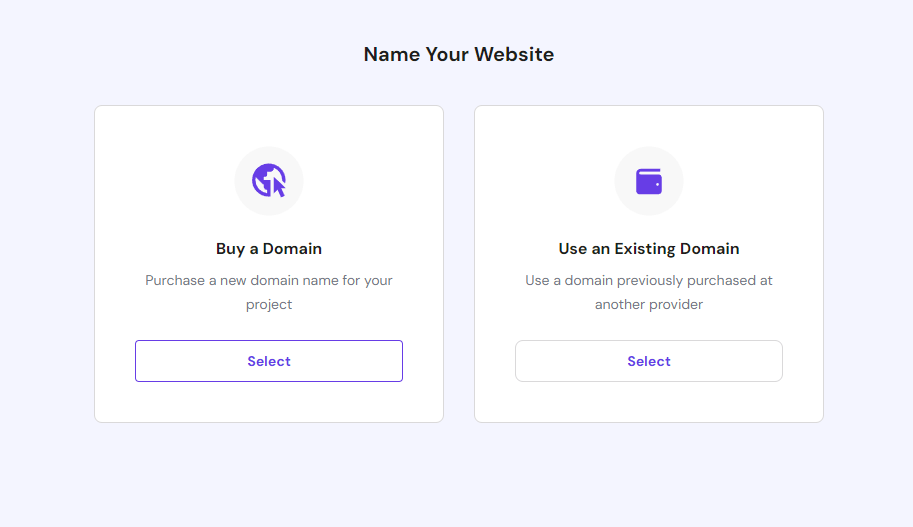
In this step, you need to choose the domain name for your website. By default, Hostinger provides a free subdomain name with your WordPress hosting package. You can the domain or buy a domain, or use an existing domain name.
And lastly, click on the continue button.
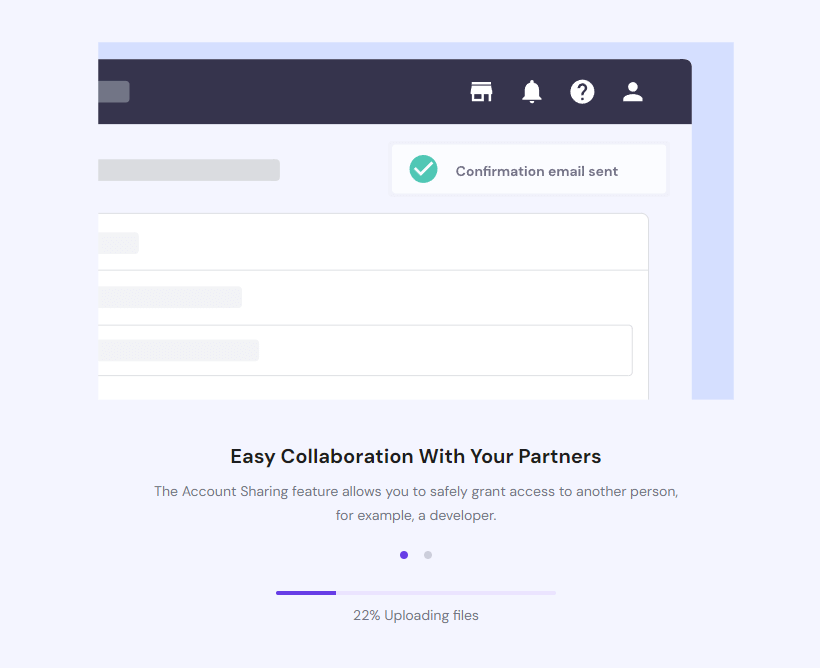
Now, your process of installing WordPress on Hostinger is complete.
You can click the “Admin Panel” button and access your WordPress dashboard to manage and customize your website.
Congratulations! You have successfully installed WordPress on Hostinger! You can now start creating your website and exploring all the features and tools Hostinger offers.
How to Setup WordPress Website
In this step, we’ll teach you some basic and pro settings for your WordPress website. Which helps you to set up your website and make it more professional.
Step 1: Change Your Website Title and Tagline
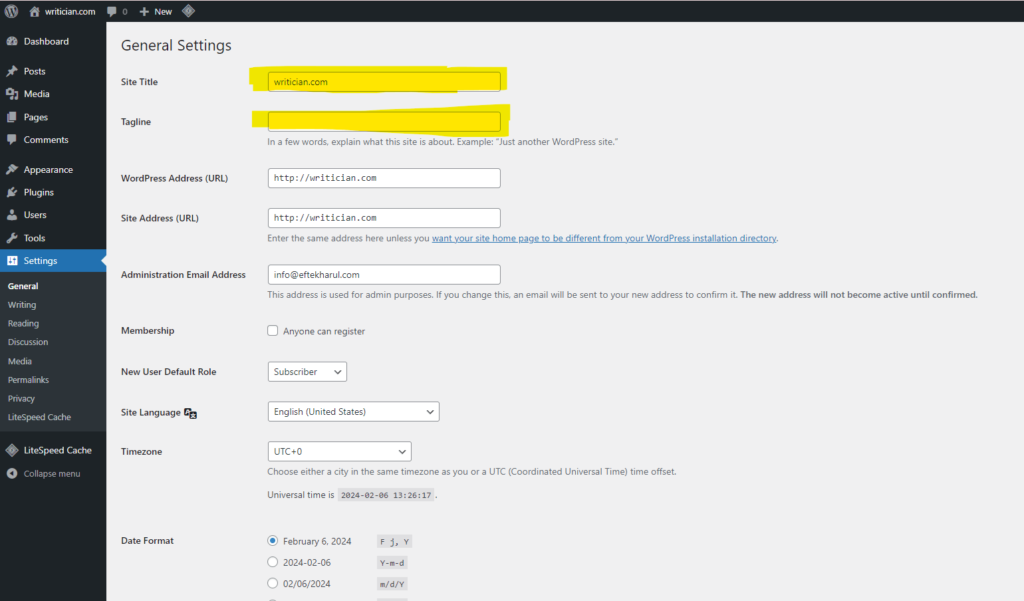
After installing WordPress on Hostinger, the first step is to change your website title and tagline. This will help visitors understand what your website is about and also boost your SEO.
To do this, go to the “Settings” tab in your WordPress dashboard and click “General. Here, you can change your website title and tagline. Remember to save the changes.
Step 2: Change Your Permalinks
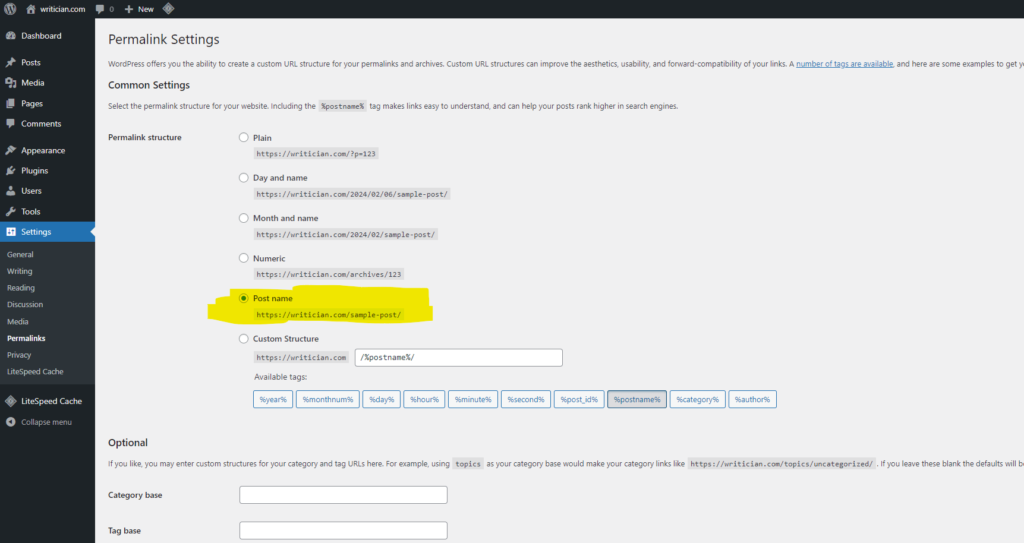
Permalinks are the permanent URLs that point to your website’s pages and posts. It is important to have structured and SEO-friendly permalinks for better search engine ranking.
To change your permalinks, click “Settings” and “Permalinks.” You can choose from different permalink structures or create a custom one here. But we highly recommend you use the “Post Name” structure because it is SEO-friendly.
Save your changes once you’re done.
Step 3: Install Your Theme
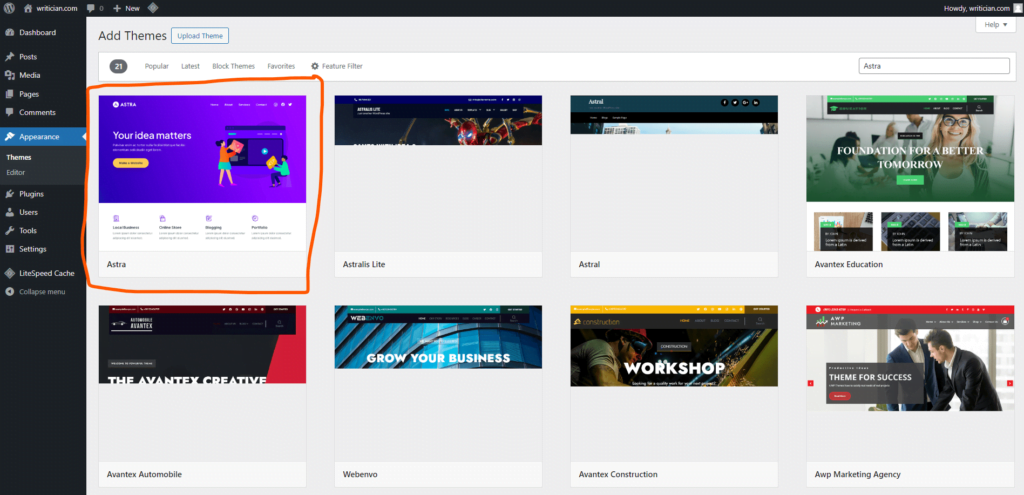
Installing a WordPress theme changes your website’s overall look and design. Hostinger offers a variety of free and premium themes to choose from. You can also upload your custom theme.
To install a new theme, go to “Appearance” in your WordPress dashboard, click on “Themes,” then click on the “+ Add New” button. Then, search for the Astra theme, click “Install,” and then activate the theme.
Step 4: Install Essential Plugins
Plugins are an essential part of a WordPress website. They add extra functionality and features to your website. Hostinger offers many free and premium plugins to choose from.
Some recommended plugins for beginners:
- Elementor: Elementor is the most popular page builder plugin for WordPress. It allows you to design and customize your website easily without any coding.
- Akismet Anti-spam: Spam Protection: Akismet is a smart spam filtering plugin that helps you protect your website from spam comments and other malicious content.
- Rank Math SEO: Rank Math is a powerful SEO plugin that helps you optimize your website for search engines and improve your rankings.
- Site Kit by Google: Site Kit by Google integrates all the features of Google Analytics, Search Console, AdSense, and PageSpeed Insights into your WordPress dashboard for easy access.
- Pretty Links: Pretty Links is a link management plugin that allows you to create clean and user-friendly URLs for your website.
- WPForms Lite: WPForms is a beginner-friendly contact form plugin that allows you to create and manage forms on your website easily.
- Easy Table of Contents: Easy Table of Contents is a plugin that automatically creates a table of contents for your posts and pages, making it easier for readers to navigate your content.
- Imagify: Imagify is a plugin that helps you optimize and compress images on your website, which improves page load speed and performance.
You can install these plugins by going to “Plugins” in your WordPress dashboard, clicking on “Add New,” searching for the plugin name, and then clicking on “Install.” Once the installation is complete, click the “Activate” button to activate the plugin on your website.
Step 5: Create Your First Post or Page
Now that you have set up your basic settings and installed essential plugins creating your first post or page is time.
To do this, go to “Posts” or “Pages” in your WordPress dashboard and click on “+ Add New.” Give a title to your post/page and add your content using the WordPress editor. You can add images, videos, and other media to make your post/page more engaging.
Once done, click “Publish” to make your post/page live on your website.
Congratulations! You have successfully set up your WordPress website on Hostinger and are ready to create unique content and build your online presence.
FAQ
You can install WordPress on Hostinger in just a few simple steps:
Step 1: Log into your Hostinger account and go to the “website” tab.
Step 2: Click “+Add Website” and select “WordPress.”
Step 3: Fill in the necessary details, such as website name, username, password, etc.
Step 4: Click “Install” and wait for the process to complete.
Congratulations! You have successfully installed WordPress on your Hostinger website.
You can get to your WordPress dashboard from Hostinger hPanel.
You can easily install WordPress on your hostinger server with a 1 Click WordPress installer.
Yeah! Hostinger is fully compatible with WordPress and provides optimized hosting for WordPress websites. Also, Hostinger offers easy 1-click installation, free SSL, and 24/7 support for all your WordPress needs.
Yeah! WordPress is completely free to use on Hostinger. However, you may need to pay for themes and plugins to add extra features and functionality to your website.
WordPress is entirely free to use, but some features may require payment. For example, premium themes and plugins may come at a cost, but the basic functionality of WordPress is completely free.
1 Click WordPress installer is the easiest way to install WordPress on your hosting server. With Hostinger, you can easily install WordPress with just one click.
Yeah! You can use WordPress offline by going to localwp.com.
Conclusion
This tutorial will help you to set up your WordPress website on Hostinger. And you don’t need to search “How to Install WordPress on Hostinger” again.
Hostinger provides accessible and affordable hosting solutions for your WordPress website, making it easier for beginners to create their online presence.
We suggest free WordPress plugins and steps to create your first post or page. Feel free to explore more and customize your website as per your requirements.
Lastly, if you need further suggestions, please contact our 24/7 customer support team for assistance. We’ll be happy to help!

