Namecheap is one of the most popular web hosting providers worldwide. It is well-known for providing affordable web hosting services and domain names.
From Namecheap, you can find a .com domain name extension for $6.49 for the first year, and you’ll find limitless domain name extensions in one place.
On the other hand, Hostinger is the most popular web hosting provider on the planet, and it is well known for providing the best web hosting services at the lowest price in the market.
For this reason, if you want to connect a Namecheap domain name with Hostinger, this article is for you.
In this article, I’ll teach you how you can add your Namecheap domain with Hostinger in less than a minute. Without any further due, let’s get started.
Quick Access
ToggleConnect Namecheap Domain to Hostinger (Video Guide)
Connect Namecheap Domain With Hostinger
To add a Namecheap domain name with Hostinger, you must first log in to your Hostinger hPanel (hpanel.hostinger.com) area.
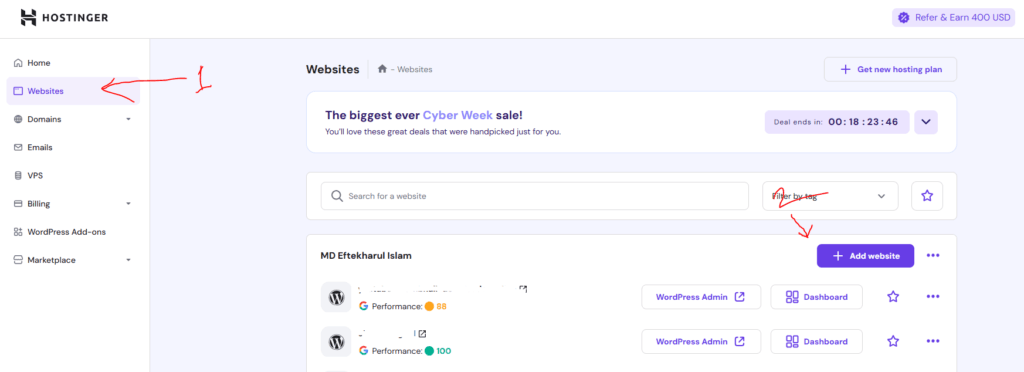
Then click on the Websites from the left-hand corner, and click on the Add Website button as in the screenshot.
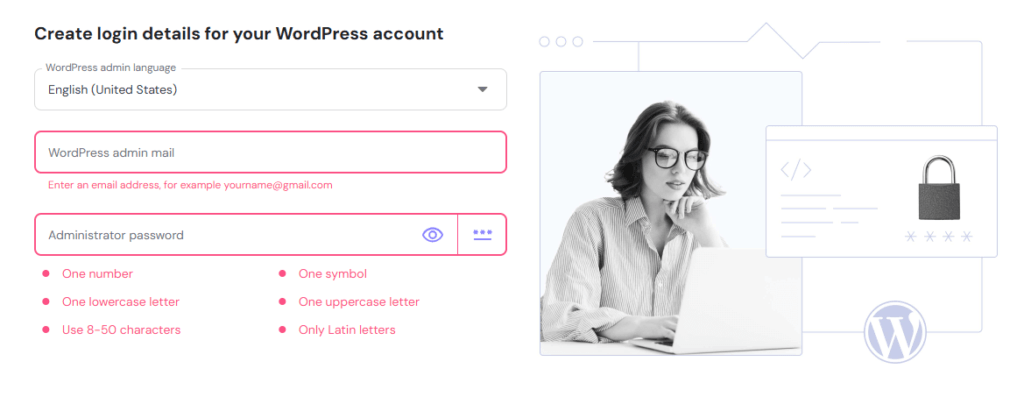
In the next step, you must provide your WordPress website admin login details. This page requires your website admin email address and password.

Here you need to paste your Namecheap domain name, which you want to add on your Hostinger account and click on the next button.
Then WordPress will be installed on your website. The installation process takes a few seconds to minutes.
Once WordPress is installed on your Hostinger account, you must change the Namecheap domain name nameserver information to Hostinger nameservers.
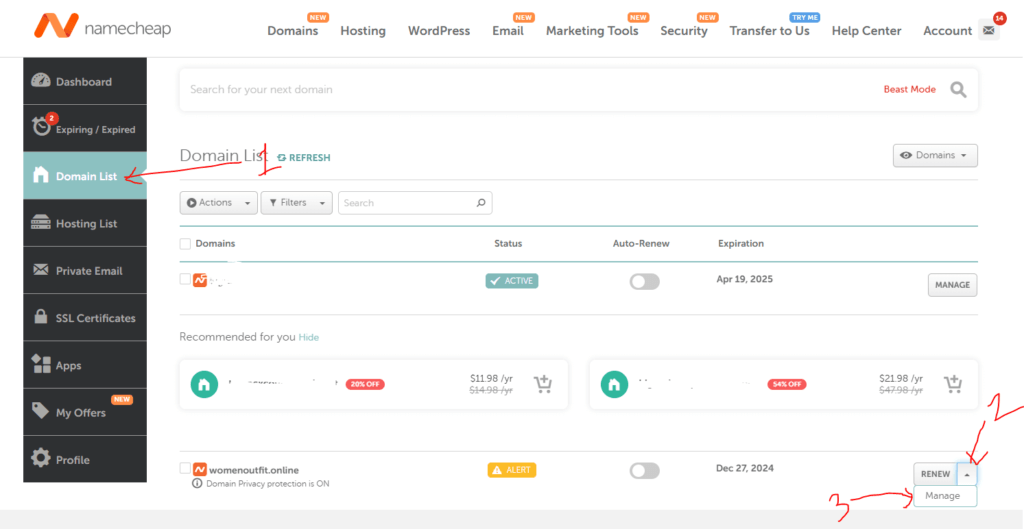
To do this, you need to log in to your Namecheap account and follow the steps below:
- Go to your Namecheap Dashboard
- Click on the Domain List from the left-side corner.
- Choose the domain name that you want to add to Hostinger
- Click on the Manage button.
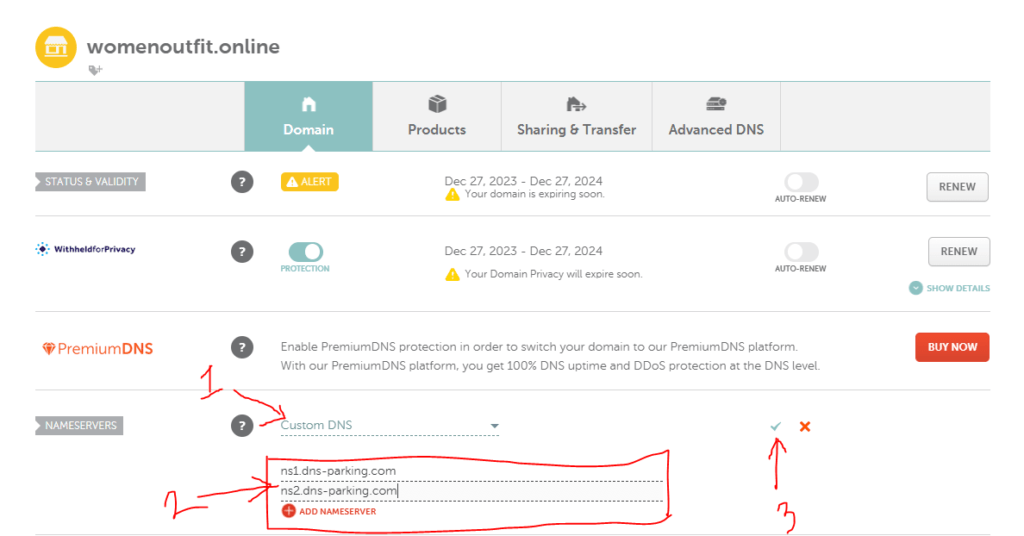
Now you need to come to the Nameserver area, choose the custom DNS, and paste the following nameserver information:
- ns1.dns-parking.com
- ns2.dns-parking.com
After that, save the changes and wait a few minutes to propagate the new nameserver information.
Once the propagation process is complete, your Namecheap domain name will be successfully connected with Hostinger.

