WordPress allows its users to install a theme in various ways, installing a theme from cPanel/hPanel is one of them.
But when we talk about the Hostinger, then the hostinger comes with its custom control panel called hPanel. hPanel control panel is fully different from traditional cPanel, but much easier to use than cPanel.
In today’s tutorial, we’ll talk about how to install WordPress theme in Hostinger within a minute. It’s going to be an informative tutorial, that will guide you through the process step by step.
So, without wasting your valuable time, Let’s get started.
Quick Access
ToggleVideo Tutorial
How To Install WordPress Theme In Hostinger
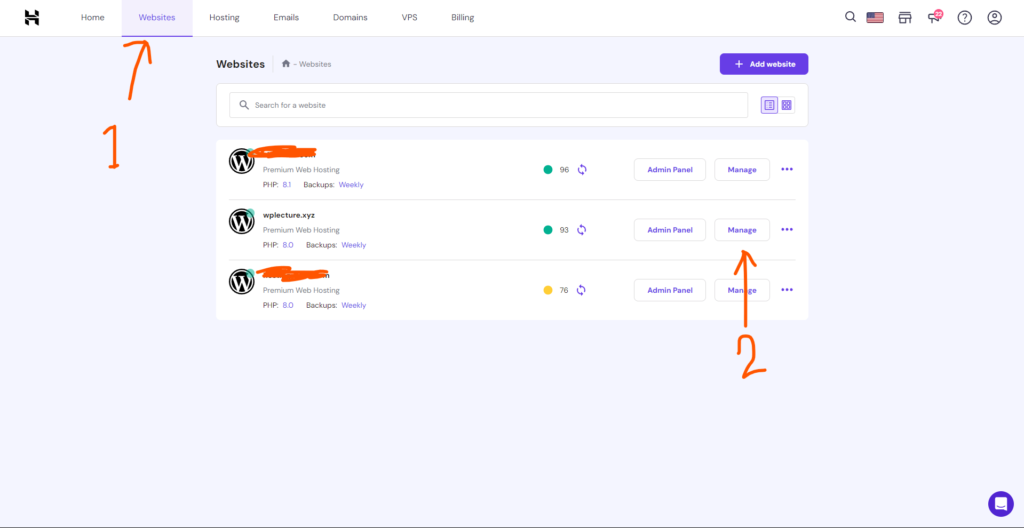
First, you need to log in to your Hostinger hPanel to your hostinger hPanel area. You need to click on websites from the header area. After going to the website section, you’ll find all the websites connected to your hostinger account.
Now click on the manage button of the website where you want to install a WordPress theme.
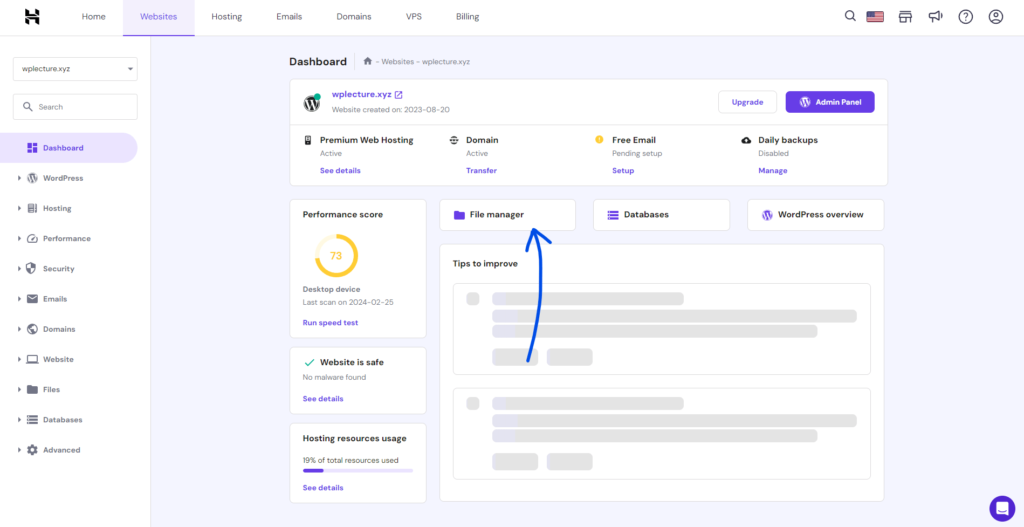
Click on the Manage button, and you’ll go to the website management section. From there, click on the “File Manager” button.
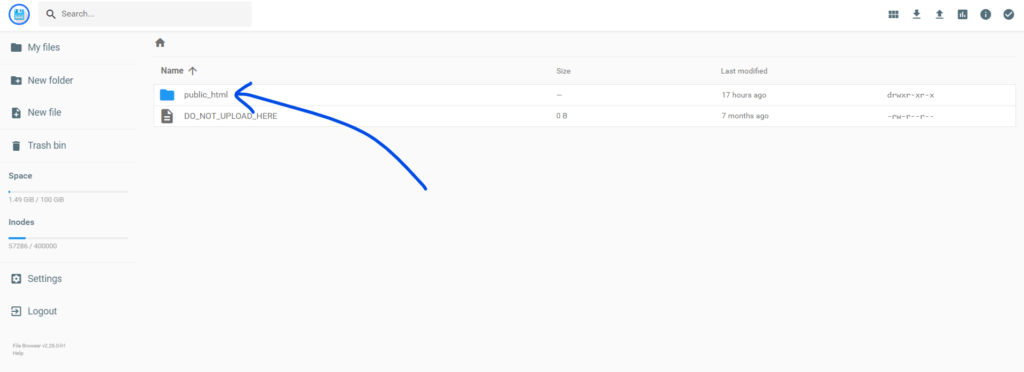
Clicking on File Manager will open a file explorer interface where you can see all the files and folders related to your website. Now, navigate to the `public_html` folder, which contains all the WordPress files. To enter the folder, you need to double-click on it.
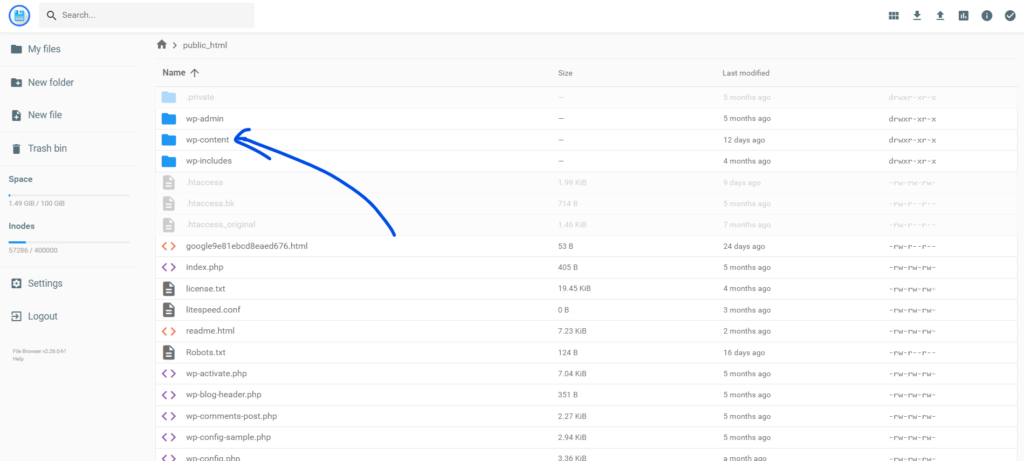
Next, you’ll find a folder named `wp-content`, double click on it to enter the file.
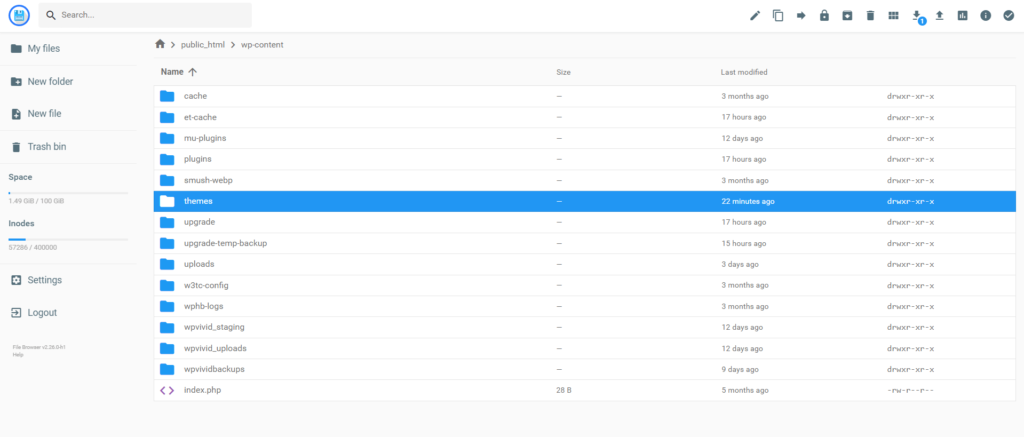
Inside this wp-content folder, you’ll find another folder called Themes as life before double click on it to enter the folder.
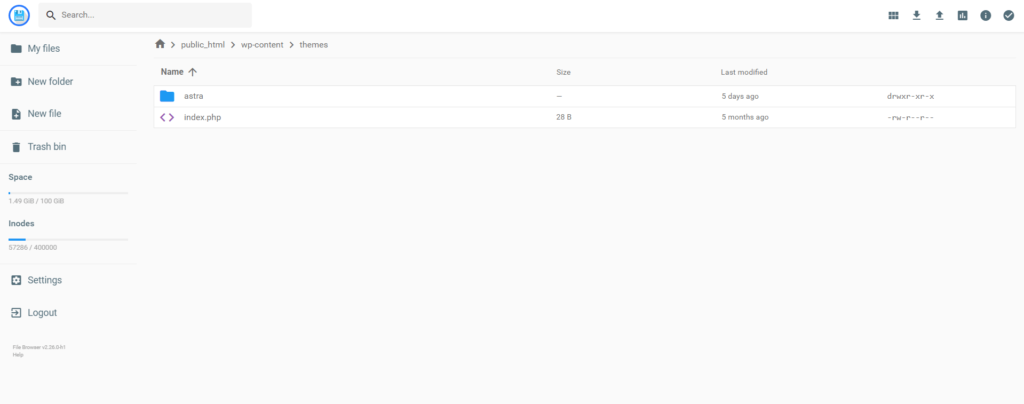
After coming to this theme folder area, here you need to upload your theme. For this tutorial, I want to install the GeneratePress theme using Hostinger.
So, first, you need to download it from the official website or WordPress.org.
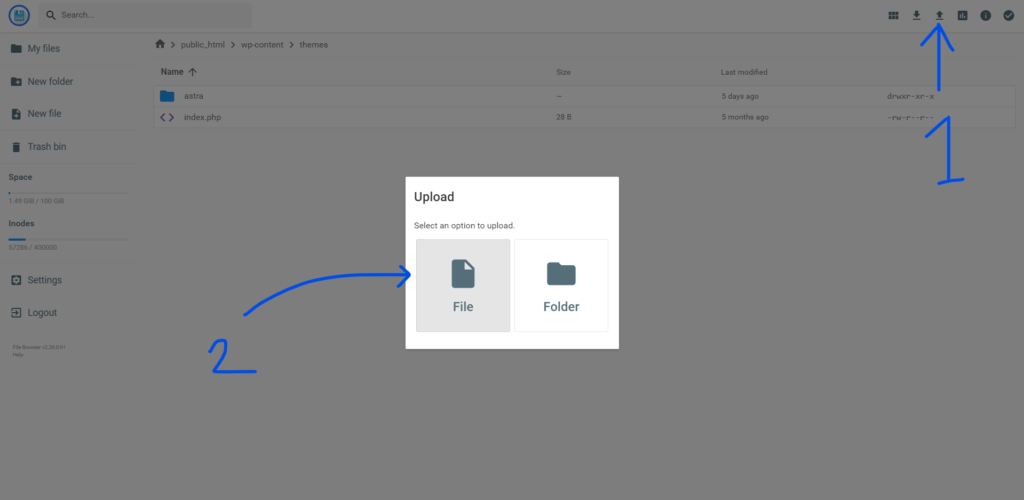
To upload the theme using hPanel, click on the upload icon in the header and select the file type. Then, choose the GeneratePress theme or whatever theme you want to install by using the hostinger and clicking on the Upload or Open button.
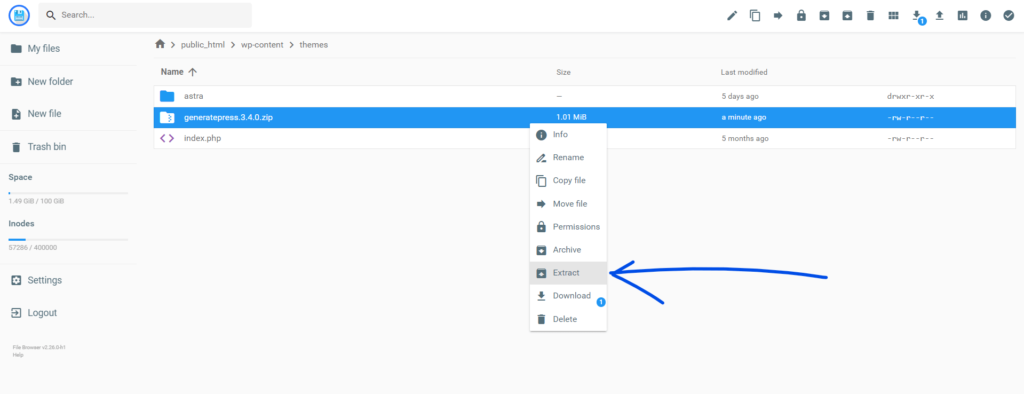
You come to this section, which means you successfully upload the theme to your Theme folder. Now you need to right-click on the Theme and click on the Extract.
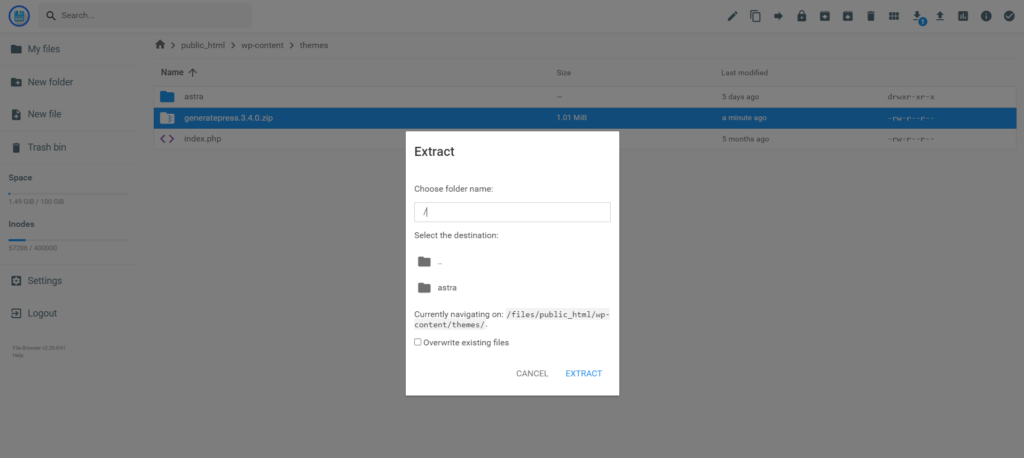
Now, a popup appears on your screen asking you for a folder name. That means where you want to extract the zip file. Type “/” and click on Extract.
Congratulations! You have successfully uploaded a WordPress theme to Hostinger. You can now delete the zip file from there.
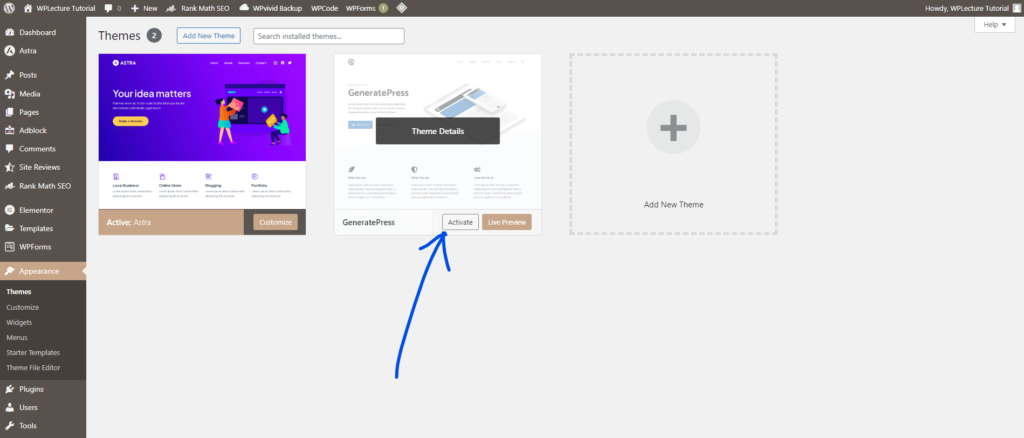
Now, go to your WordPress admin area, click on Appearance, and then click on Theme.
From here, you can see all the themes you have uploaded using the hPanel file manager. Find the GeneratePress theme and click on the activate button.
Congratulations! You have successfully activated a WordPress theme in Hostinger using hPanel. Now, you can customize your theme and start building your website easily.
Conclusion
I hope this tutorial was helpful for you in installing a WordPress theme on Hostinger.
This is not the best way to install a WordPress theme, most most straightforward way to install a WordPress theme using the WordPress admin panel. But these ways help you to learn a different way to install a WordPress theme.
I hope this tutorial will help you find a new way to install a WordPress theme. If you have any further questions, please comment below. We’ll be happy to help you.

