Cloudways makes it very easy to migrate your WordPress website to Cloudways.
The sound of migrating a WordPress website is a little bit complicated, but Cloudways makes it super easy, even if you’re a complete beginner.
If you’re one who wants to migrate your existing WordPress website to Cloudways, then this quick guide is for you.
In today’s step-by-step guide, we’re going to cover the entire process of migrating your WordPress website to Cloudways without breaking your site.
So, let’s get started:
Quick Access
ToggleStart Your Free Trial on Cloudways
Cloudways offers a 3-day free trial for new users, and to start your trial period, you don’t need to provide your credit/debit card information.
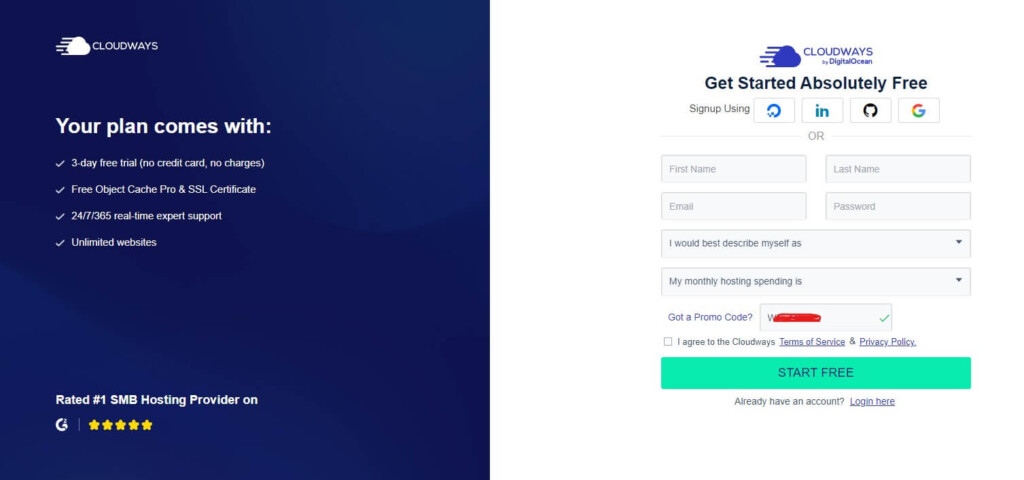
To go to the Cloudways free trial page, click here. You’ll then be automatically redirected to the Cloudways sign-up page. The best part is that if you use this special link, you’ll get up to 20% off for 3 months on all Cloudways plans.
After coming to the Cloudways sign-up page, you need to provide your First & Last Name, Email, and Password, describe yourself, and your monthly budget for Cloudways. And click on the Start FREE button.
Then, your Cloudways account will be created.
How to Migrate WordPress Website to Cloudways
To start migrating your WordPress website to Cloudways, log in to your WordPress website admin panel. Then, hover over Plugins and click on Add New Plugin.
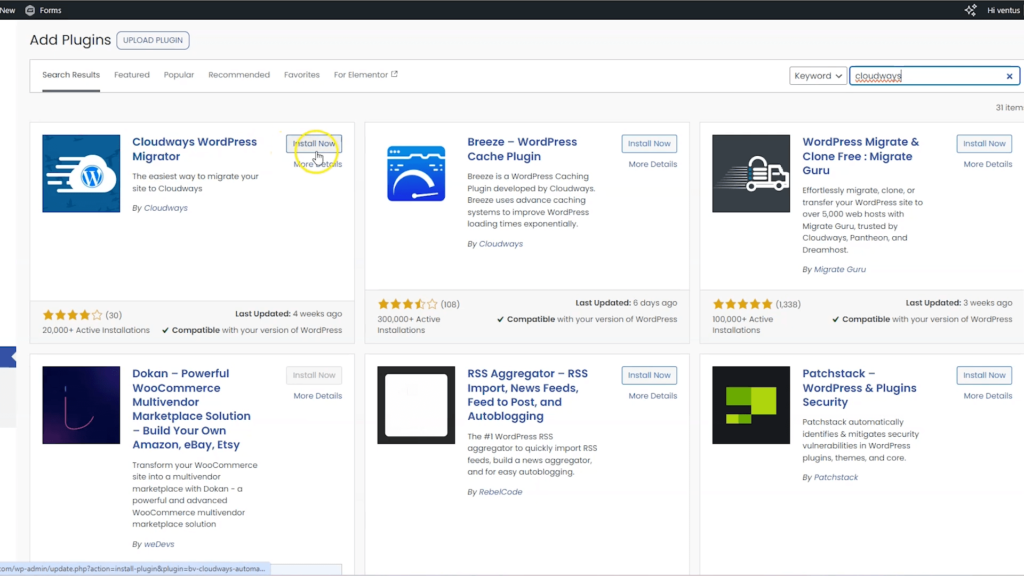
Then you need to search for a plugin called “Cloudways WordPress Migrator”, after finding the plugin click on the Install Now button, when the installation process is complete click on the Active button.
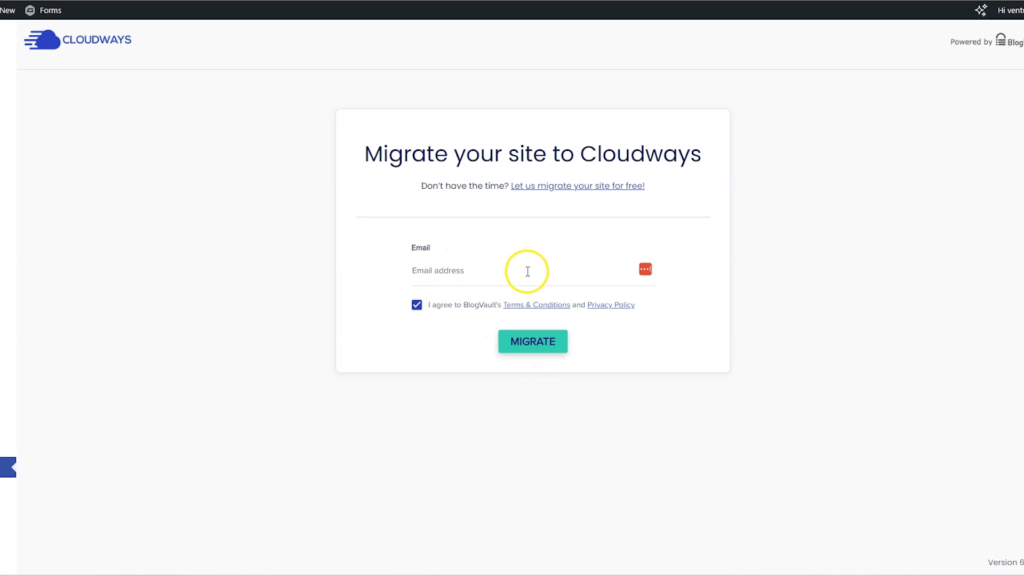
After installing the Cloudways migrator plugin, the “Migrate your site to Cloudways” popup will open. Now you need to provide your email address, and checkmark their term & condition and click on the Migrate button.
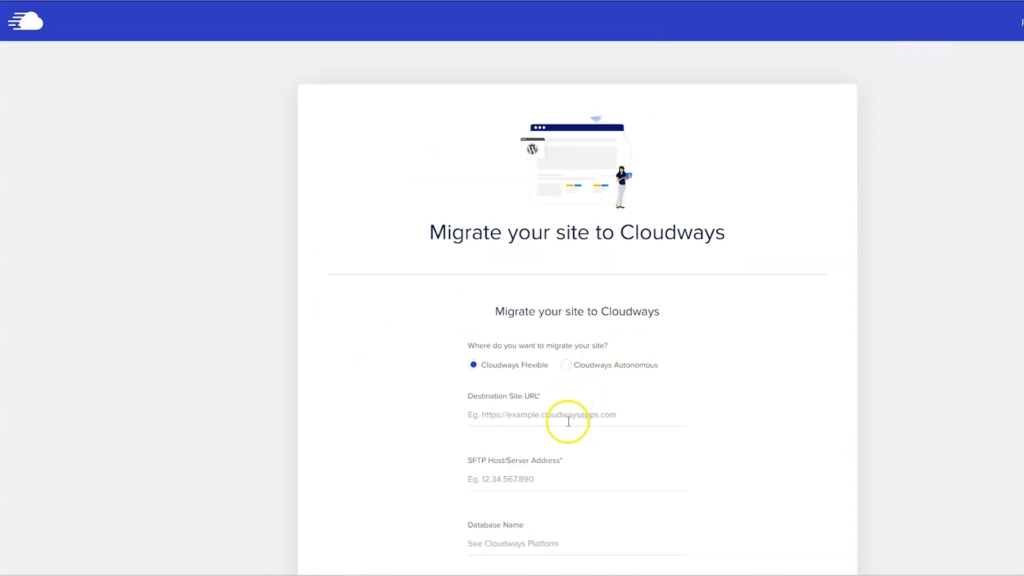
Cloudways allows you to go with two different migration processes, Cloudways Flexible and Cloudways Autonomous. But for this tutorial, we’re going with the Cloudways Flexible.
After choosing your migration destination type, you need to provide the following information in the next step: the Destination site URL, SFTP Host/Server Address, and database name.
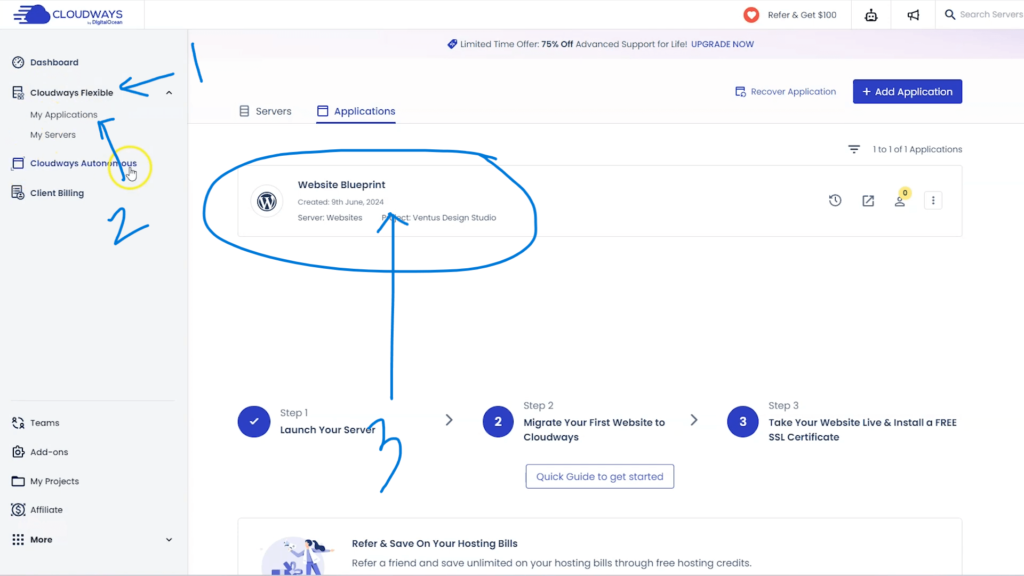
To get the following information, you need to go to your Cloudways account, click on My Application under Cloudways Flexible, and then click on your application.
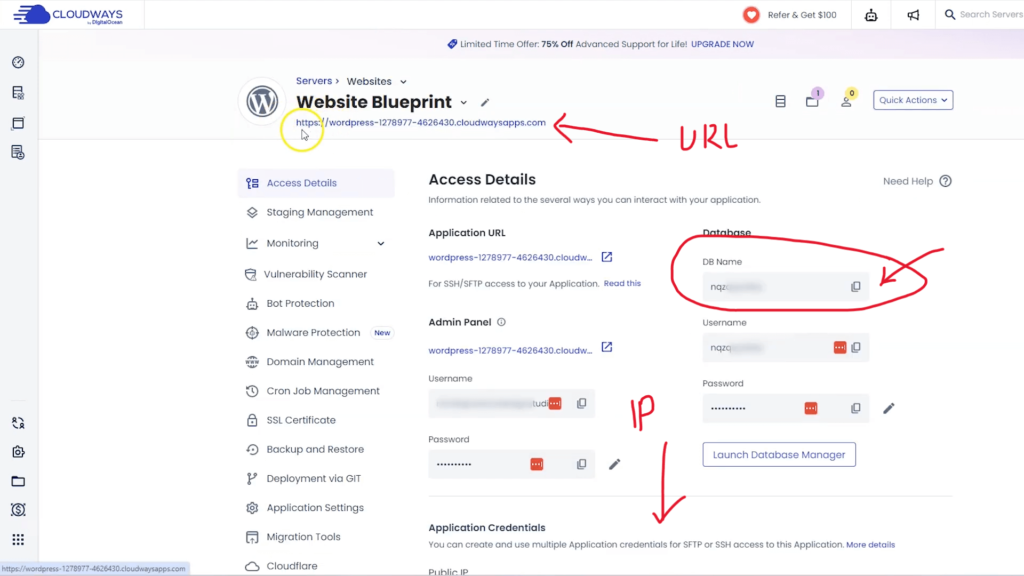
The first selection is your application IP address; on the right-hand side is your Database name. And you need to scroll down to find the SFTP Host/Server Address (Server IP). After seeing all of the information, you need to paste it to the right destination.
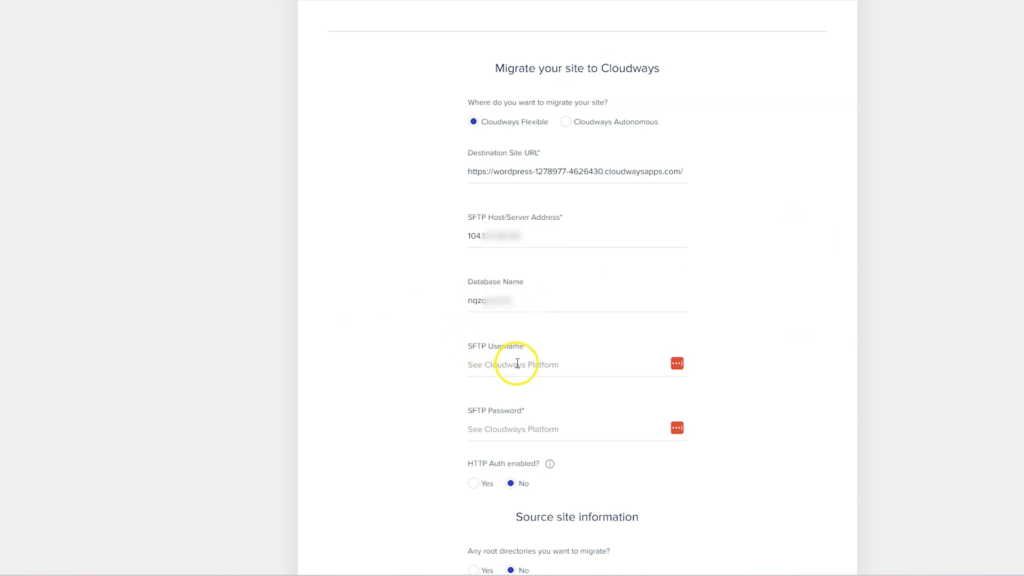
Now, you need to paste your SFTP username and password.
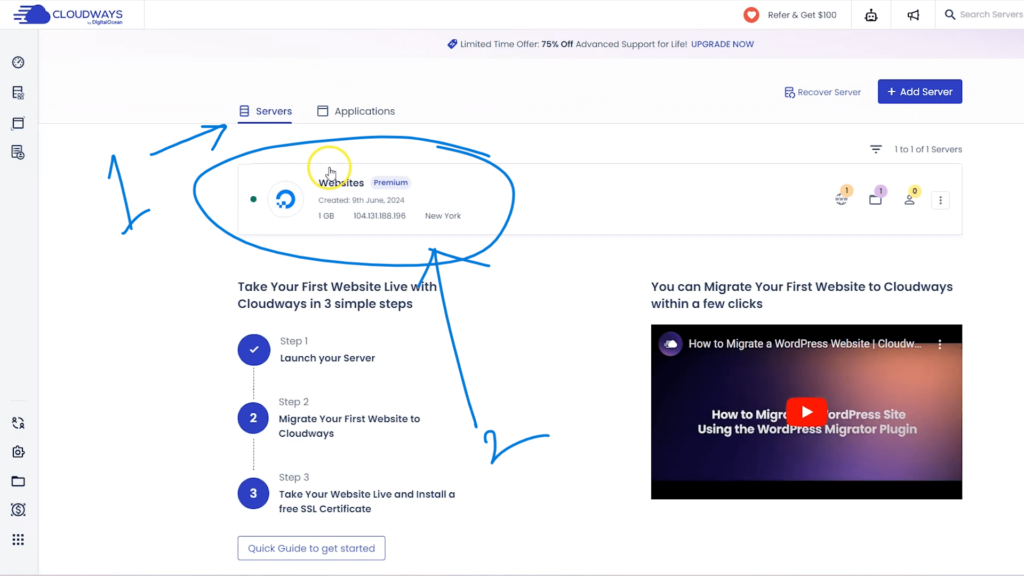
To get your SFTP username and password, click on the Server and then click on your server.
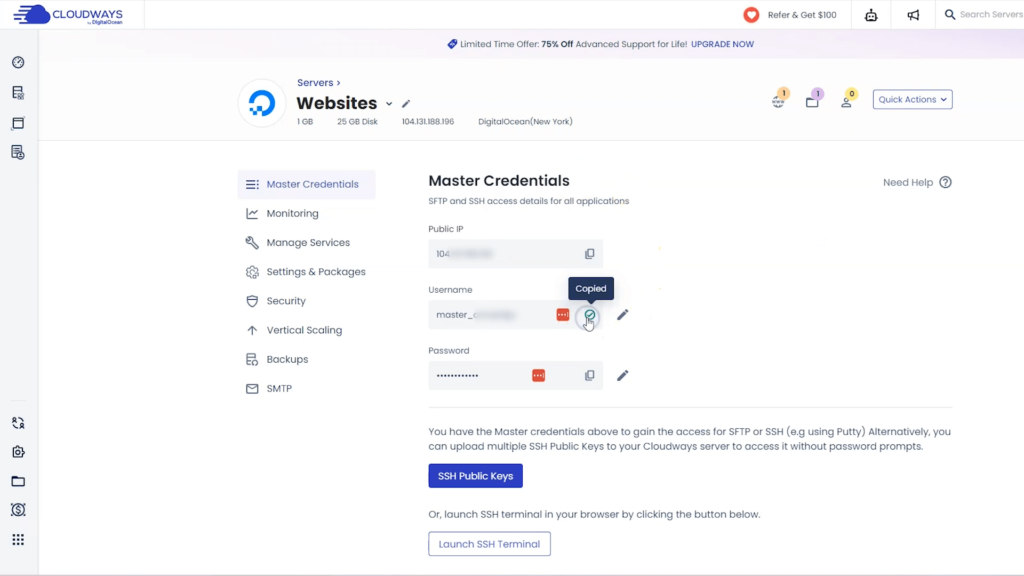
Then, the Master Credentials will open; you need to copy your Username and password and paste them to the right destination.
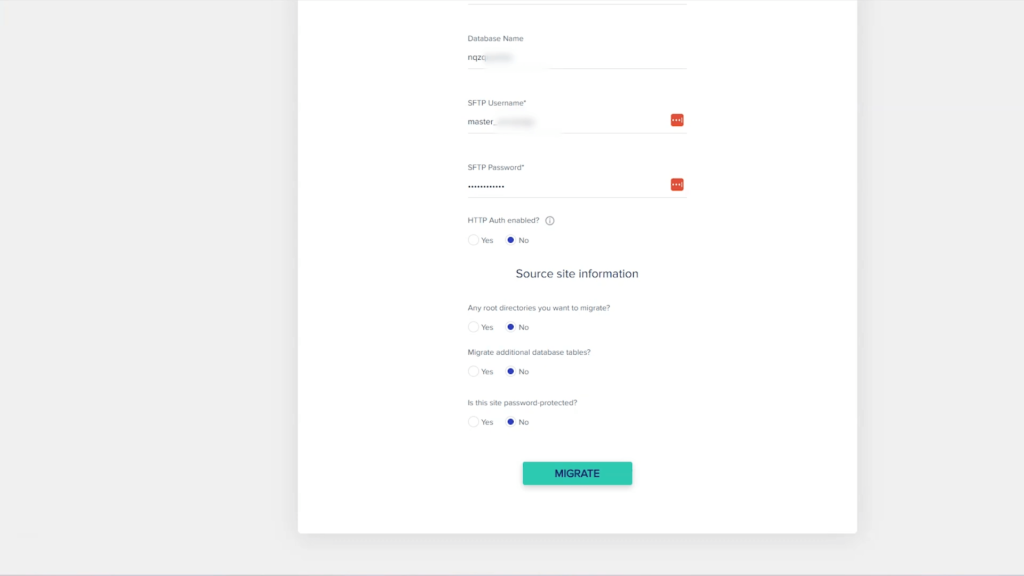
Now, you need to answer questions like Is your site HTTP Auth Enabled? Are there any root directories you want to migrate? Should you migrate any additional database tables? Is your site password-protected?
After completing this, you need to click on the Migrate button.
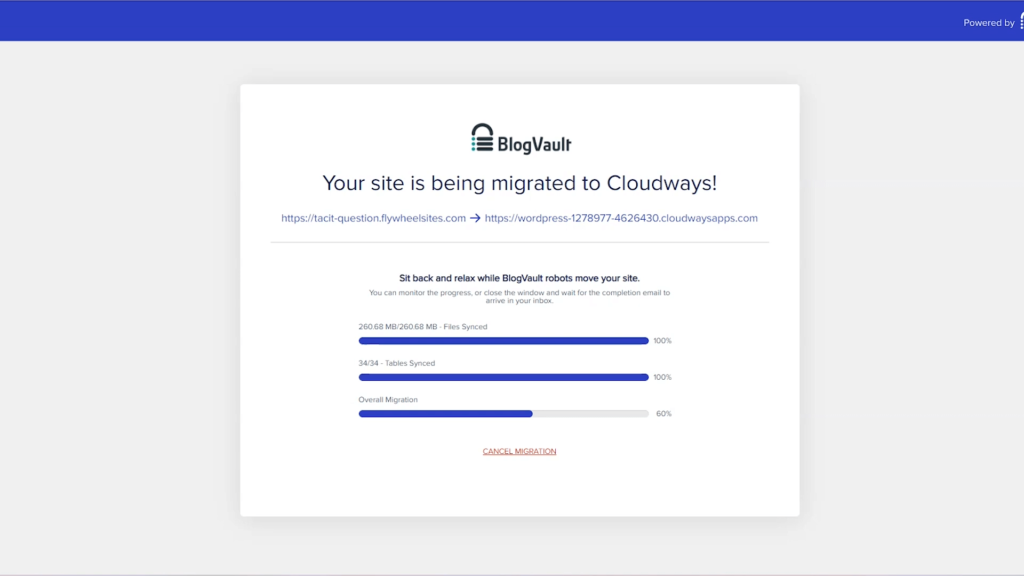
Then you’ll see this kinds of popup “Your site is being migrate to Cloudways”.
Now, grab a cup of coffee and wait for a while. Your website will be migrated to Cloudways. Depending on its size, this migration process can take a few minutes.
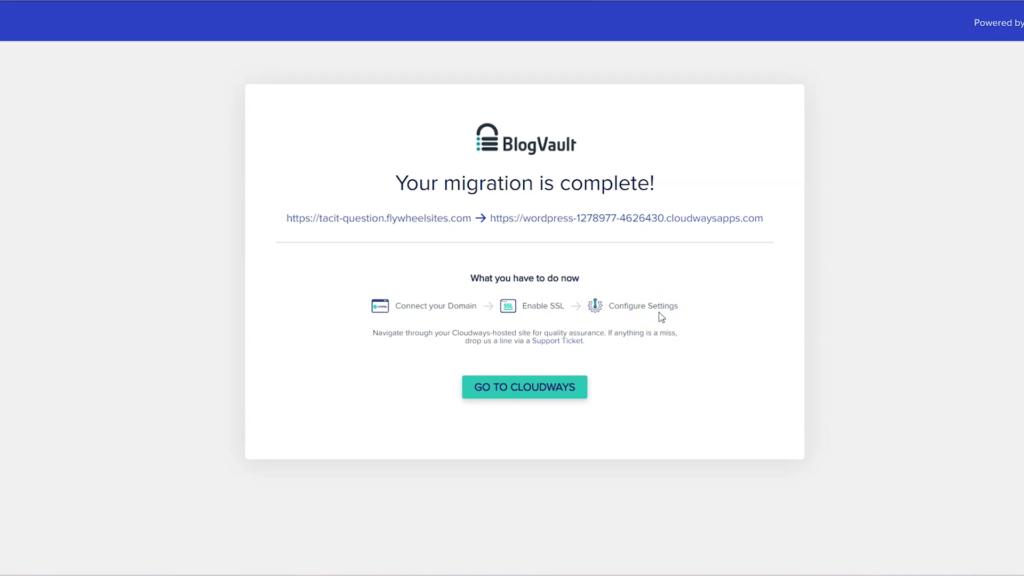
After waiting a few minutes, your site will be fully migrated to Cloudways.
Congratulation! You’ve successfully migrated your WordPress website to Cloudways. Now, you can enjoy the fast and secure hosting services of Cloudways for your WordPress website.

