Hostinger & Godaddy are the most popular web hosting providers, well-known for providing quality and affordable web hosting services.
But if you’re an existing user of Godaddy and want to transfer your website to Hostinger web hosting, then this tutorial is for you. Hostinger provides free migration to their users, by using the Hostinger free migration features you can transfer your website from Godaddy to Hostinger without a single minute of downtime.
This migration process is very easy for a beginner or expert whatever you are. But it sounds like a technical process for those who don’t have any experience.
But Don’t worry! We have created this tutorial to help you migrate your website from Godaddy to Hostinger in the easiest way possible.
Quick Access
ToggleHow to Migrate Website From Godaddy to Hostinger
In these easy few steps, we’ll guide you on migrating a website from Godday to Hostinger with Hostinger free migration features. This process helps to migrate your site without a single minute of downtime.
Step 1: Get a Web Hosting From Hostinger

If you want to migrate your website from Godaddy to Hostinger, then you need to purchase web hosting from Hostinger. Hostinger offers all kinds of web hosting services such as Web, WordPress, VPS, Cloud, Dedicated, and many more.
If you just started then their web hosting is the perfect option for you, or if you plan to build a WordPress site, then Hostinger WordPress hosting is also the best option for you. And if you need more power and more control over your services, then VPS or Dedicated hosting might be the best option for you.
On the Hostinger checkout process, you can use Hostinger coupon code to get an additional discount. This will help you a lot if you’re just starting.
Step 2: How to Start Website Transfer Process

To start the Godaddy to Hostinger migration process, you need to log in to your Hostinger hPanel. After coming to the Hostinger hPanel area, you need to click on Websites, then Add Website, and lastly Migrate Website.

Then you need to type the website name, which you want to migrate to your Hostinger account and then click on the Next button.
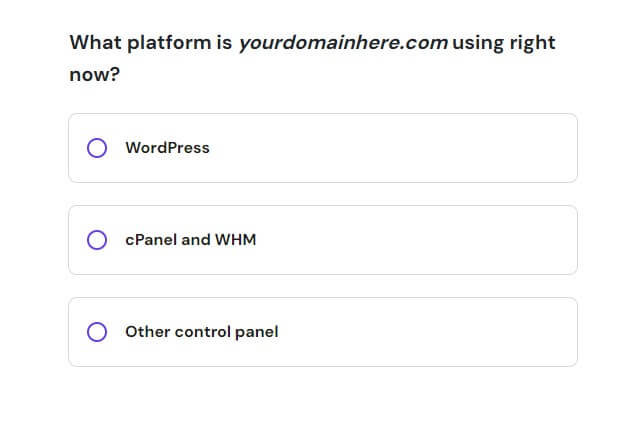
In the next step, you need to choose the platform that you’re using right now. Using Hostinger migration features you can transfer WordPress, cPanel & WHM, and other control panel-hosted websites.
How to Migrate WordPress website to Hostinger
If you want to migrate the WordPress website to Hostinger, then this part is for you. But if you want to migrate the cPanel or WHM site, then you can skip this part.
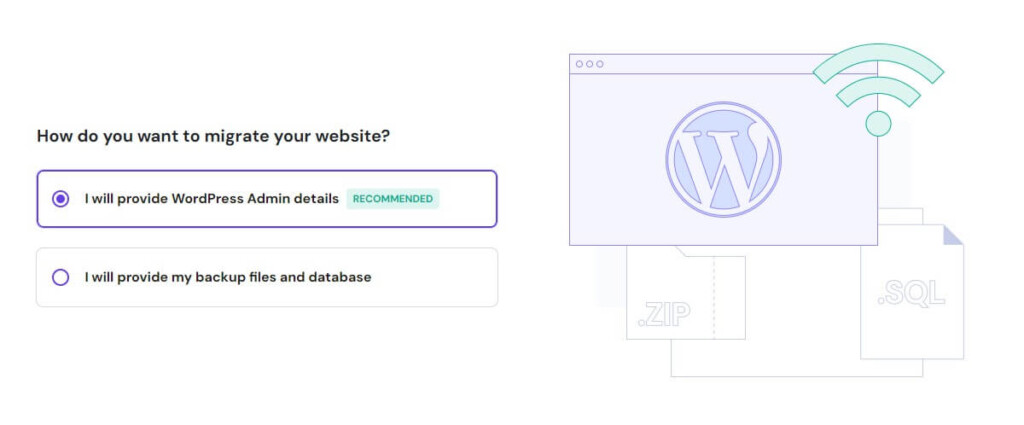
After choosing WordPress as your website platform, you’ll come to this page. Now you need to choose the first option, “I will provide WordPress Admin Details” It’s the easiest process and click on the Next button.
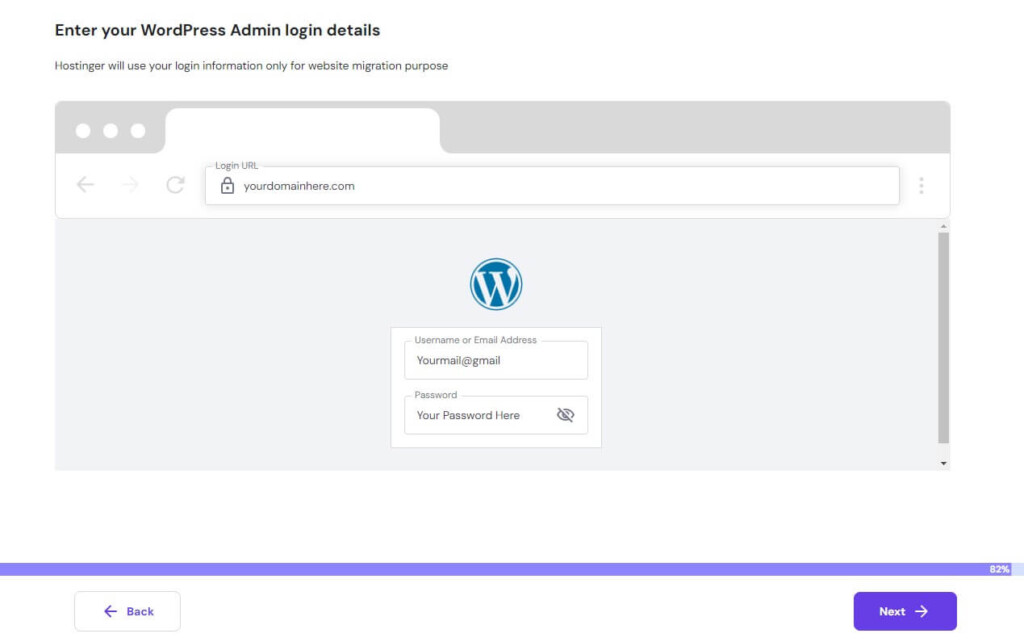
After coming to this page, you need to provide your WordPress login details such as login URL, email, and password. Then click on the Next button to start the migration process.
How to Migrate the cPanel website to Hostinger
If you want to migrate a cPanel or WHM site, then this part is for you.
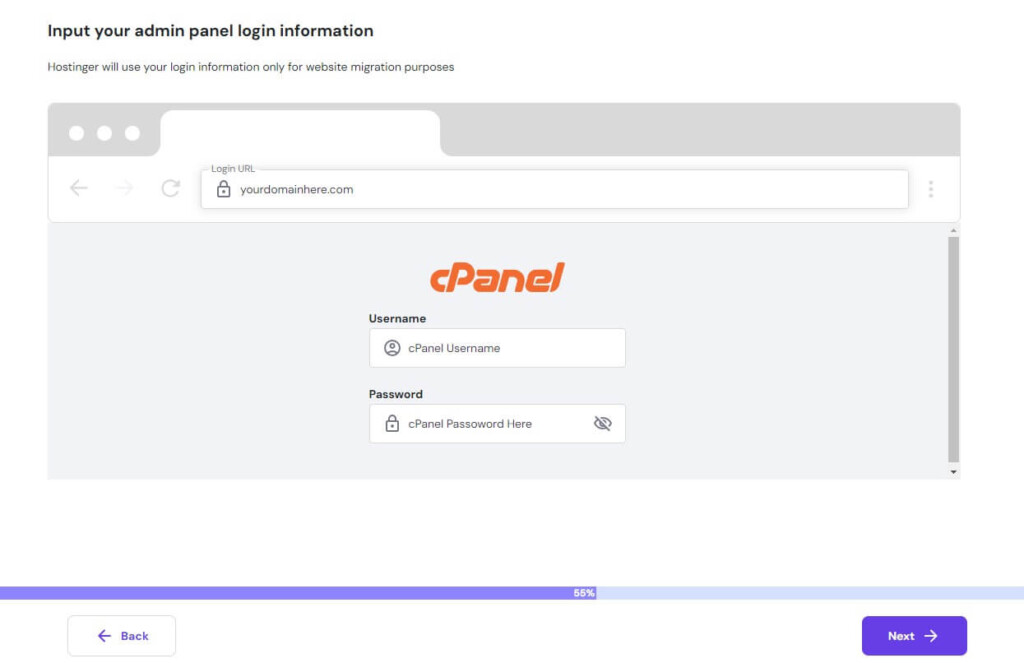
Choosing your website platform as cPanel, you’ll come to this page. After coming to this page, you need to provide your Godaddy cPanel login details.
To get cPanel login details, you need to log in to your Goodaddy accounts, then hover on the account from the top and click on My Products. Click on Manage under the web hosting section. Then click on cPanel Admin, and finally, copy your cPanel login details.
Congratulations, now you have successfully migrated your website from Godaddy to Hostinger.
Step 3: Change Your Domain NameServers
Changing your domain nameserver is another important task after migrating a website from Godaddy to Hostinger. But if you’re using a Hostinger domain or want to transfer your domain name to Hostinger, then you don’t have to change your domain nameserver.
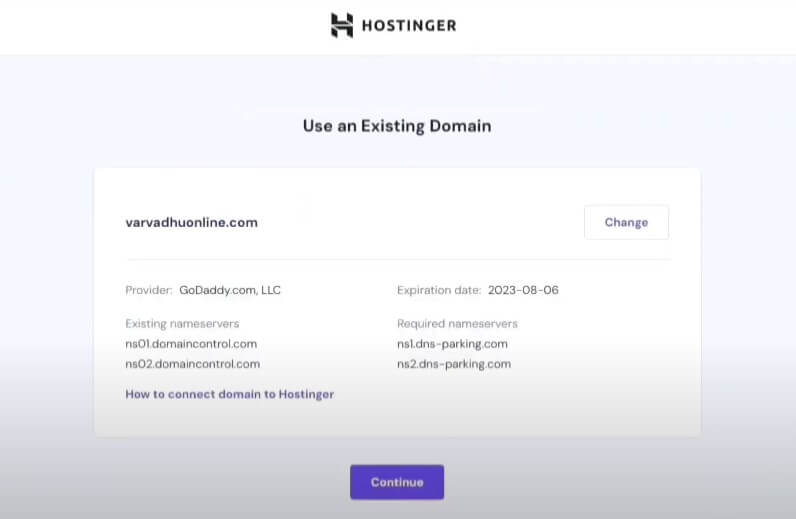
But if you’re using a third-party domain like Godaddy, then you need to change the nameserver records with Hostinger’s nameservers. After completing your migration process, this kind of window appears on your screen and asks you to change your nameserver.
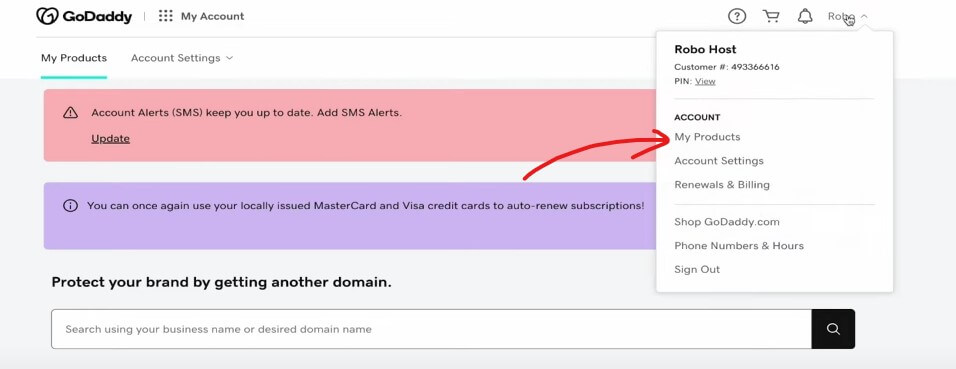
After logging in to your Godaddy dashboard, you need to hover on your profile and then click on My Products from the drop-down menu.
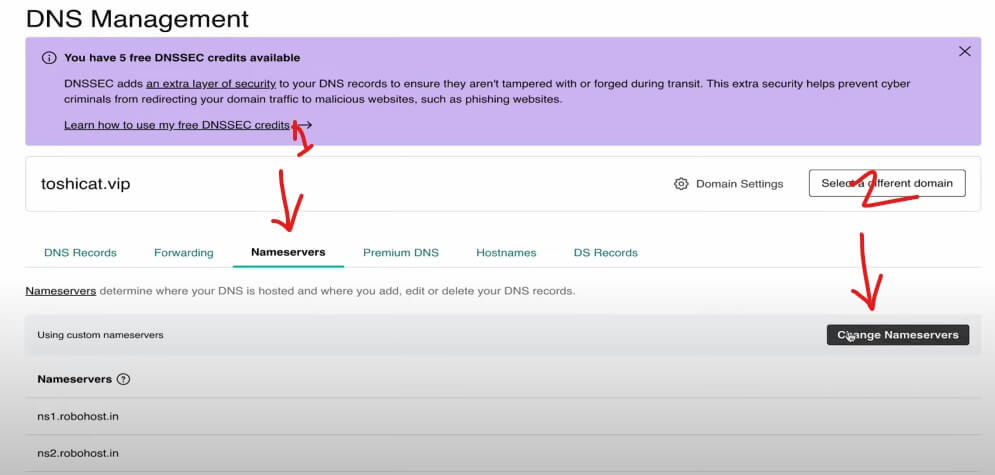
When you come to the DNS management page, you need to click on the Nameservers from the top menu bar, and then click on the Change Nameservers button.
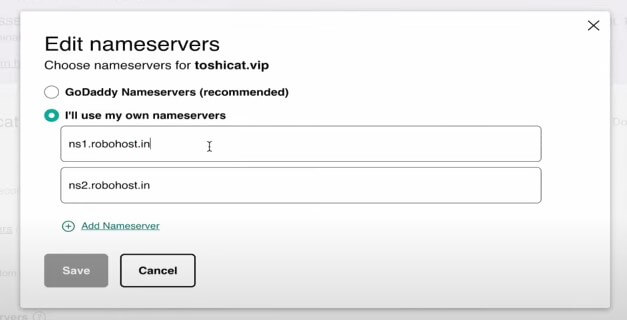
In this final step, you need to enter the **Hostinger nameservers **in the Nameserver 1 and Nameserver 2 fields. Then click on Save.
Note: change nameserver takes time to propagate, it may take up to 24 hours. You can check your website’s propagation status by using DNS Checker.
Congratulations, you have successfully migrated your website from Godaddy to Hostinger and changed your nameserver records. Now your website will be live on the new hosting provider with no downtime.

